What apple pie is for baking is the granny square for crochet. It is one of the easiest things to learn, and therefore for most crocheters the granny square is the start of their crocheting journey. The first thing my granny taught me was the granny square 🙂 But then, when you’ve mastered the humble granny square you learn that there are so many variations, in colours, stitches and shapes that what you first thought was a simple beginning opens up a whole new world for you to dive into.
Anyway, you’re not here for my thoughts on granny squares, except for that one thought: how to make the perfect granny. Well, don’t go anywhere because I’ll show you here.

Wat appeltaart is voor bakken is de granny square voor haken. Het is een van de gemakkelijkste dingen om te leren en daarom is de granny square voor veel hakers het begin van hun haak avontuur. Het eerste dat mijn oma mij leerde was, inderdaad, de granny square. Hoe toepasselijk 🙂 Maar wanneer je eenmaal het ‘eenvoudige’ vierkant onder de knie hebt ontdek je al snel dat dat je kunt gaan varieren met kleuren en verder gaan met steken, vormen enzovoorts. Een hele nieuwe wereld ligt dan voor je open.
Maargoed, je bent hier vast niet voor mijn gefilosofeer over granny squares, behalve dan voor dat ene punt: hoe maak ik dan die perfecte granny? Nou, dat ga ik je hier laten zien.
Bewaar deze post op pinterest voor later!

Although many people like to make their granny squares with a chain 4 to make a circle and a chain 3 as the first dc I am going a slightly different route which, in my opinion, gives a neater result. Let me know what you think!
Here we go. I’ll show you with photo’s, above each photo is a description of the steps to take. This tutorial includes finishing a round and switching the colour.
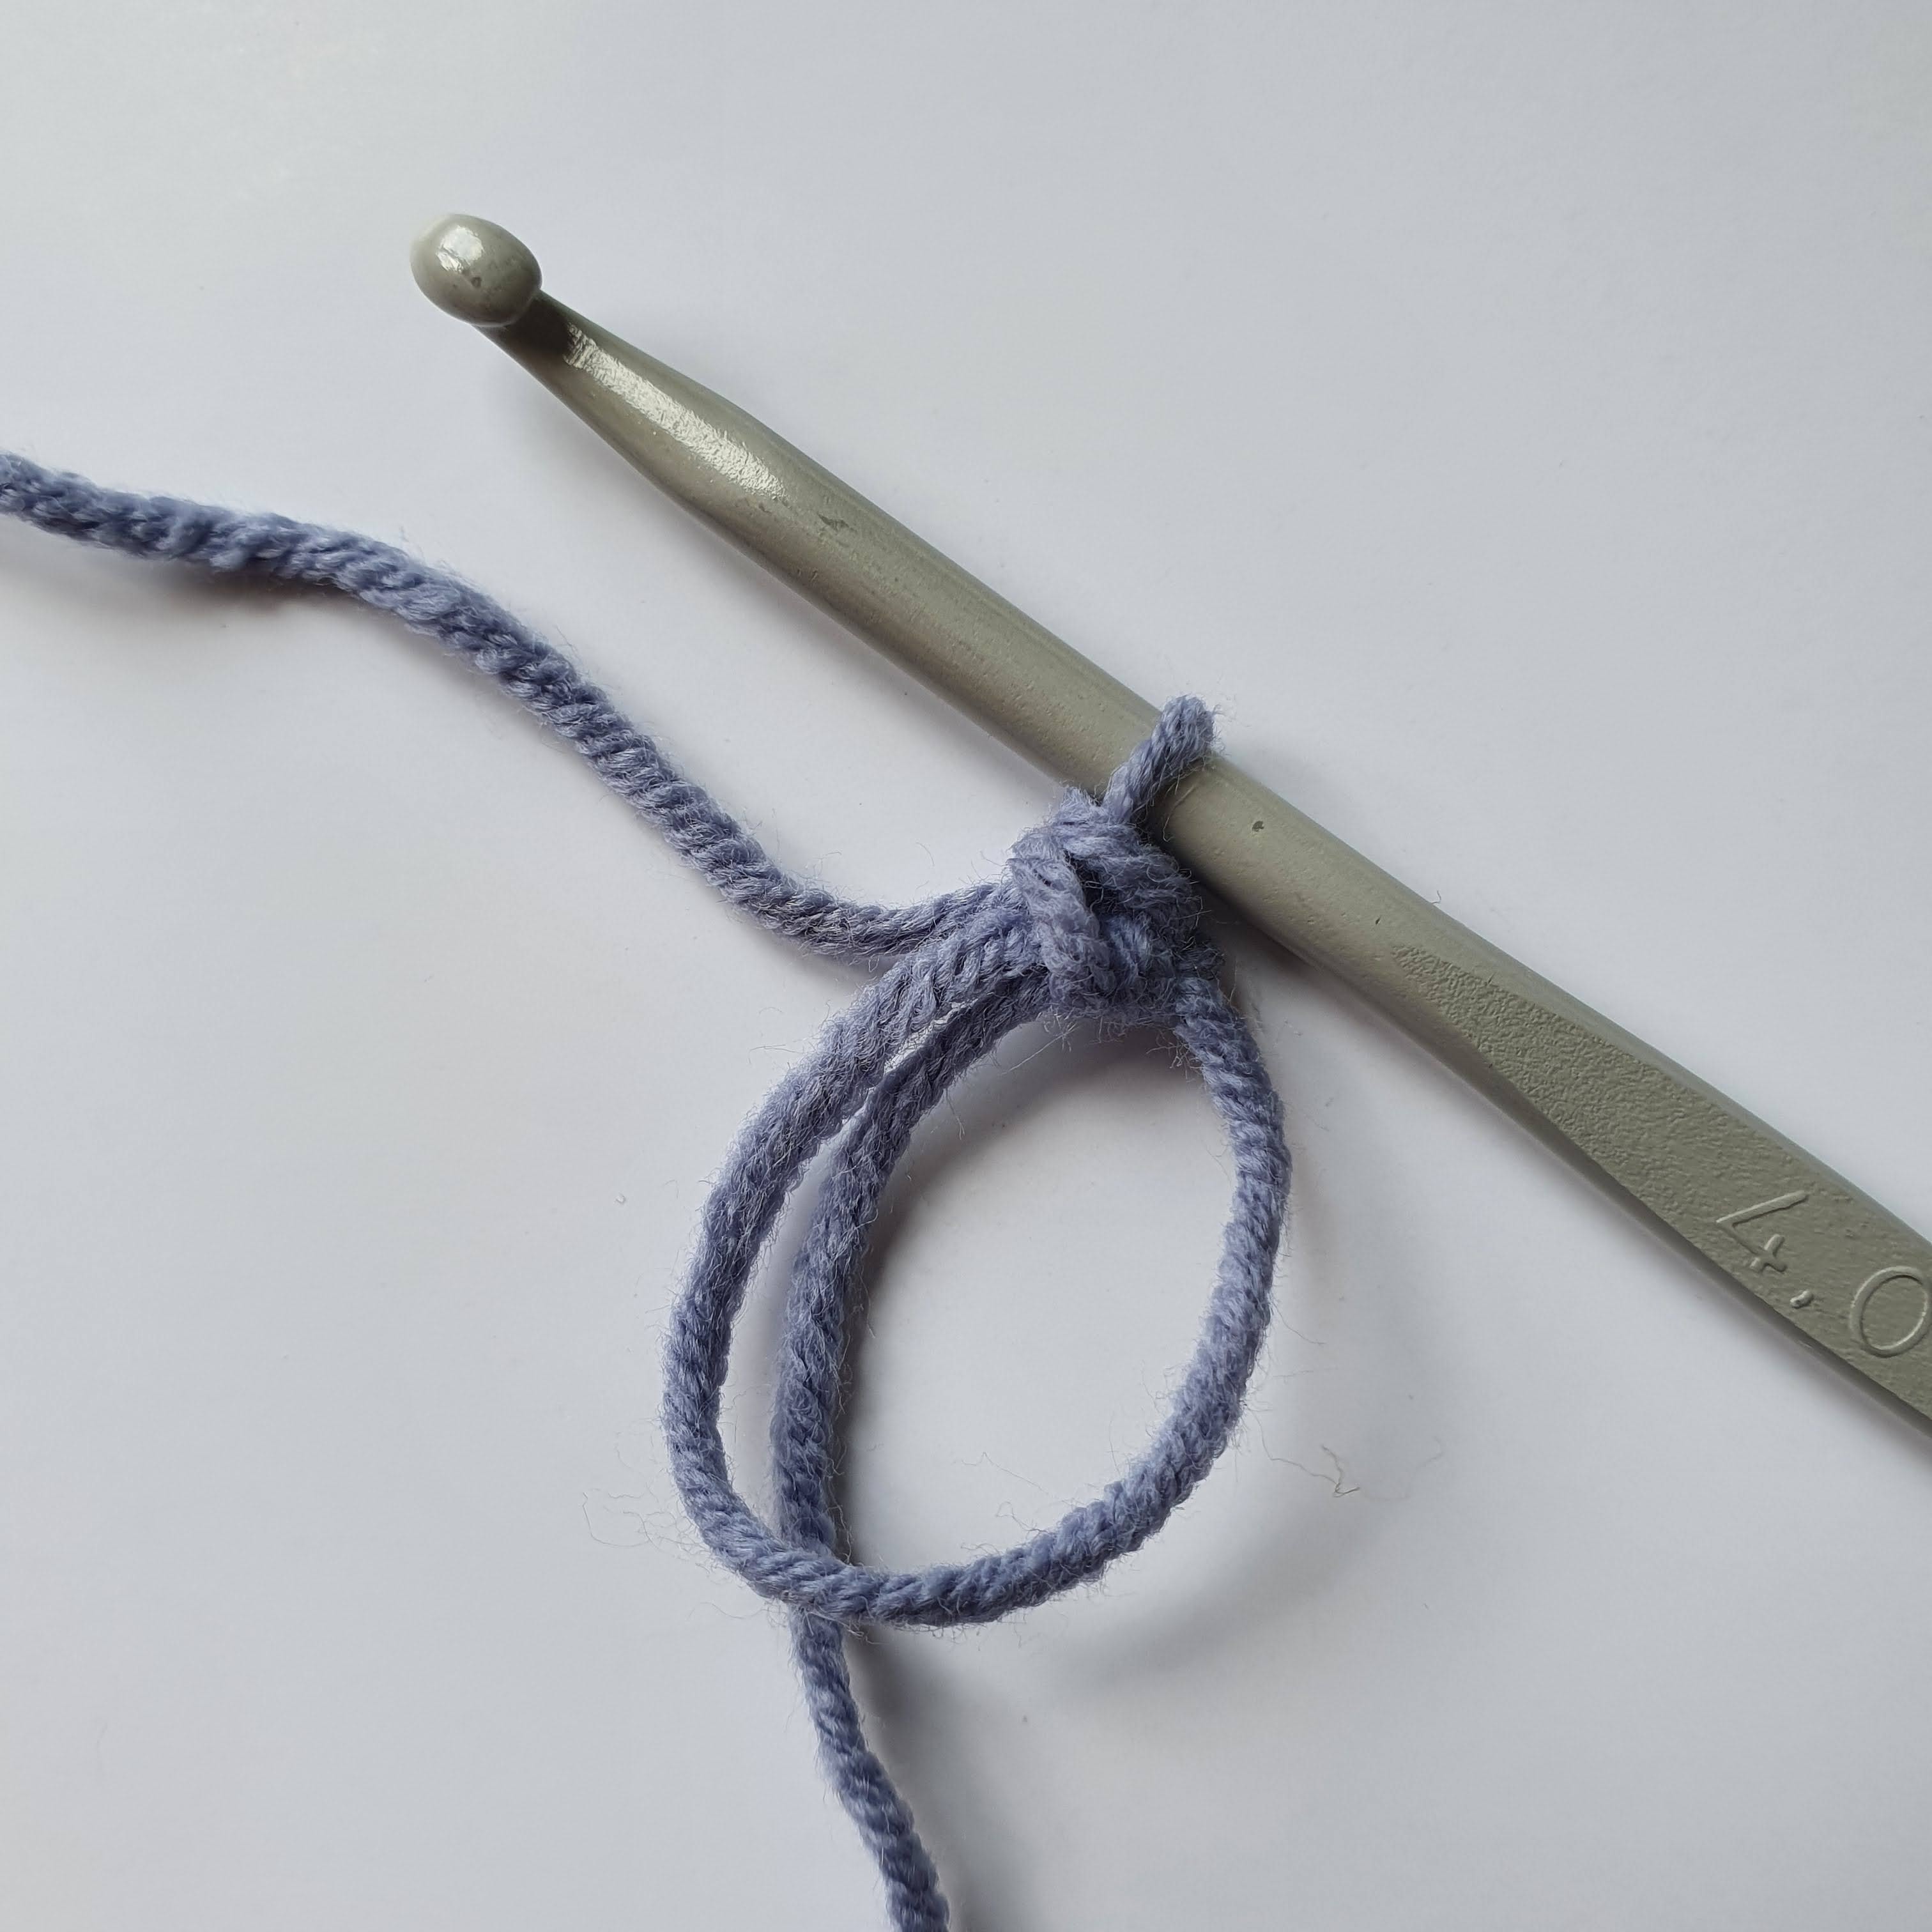
2. Make an sc in the magic ring
2. Maak een vaste in de ring
3. Chain 3 (now you’ve made a begin-dc (sc+ch) and 2 more chains)
3. Maak 3 lossen. Je hebt nu je begin stokje (vaste+losse) en nog 2 lossen
4. Make 3 dc in the round, chain 2
4. Maak 3 stokjes in de ring, daarna 2 lossen
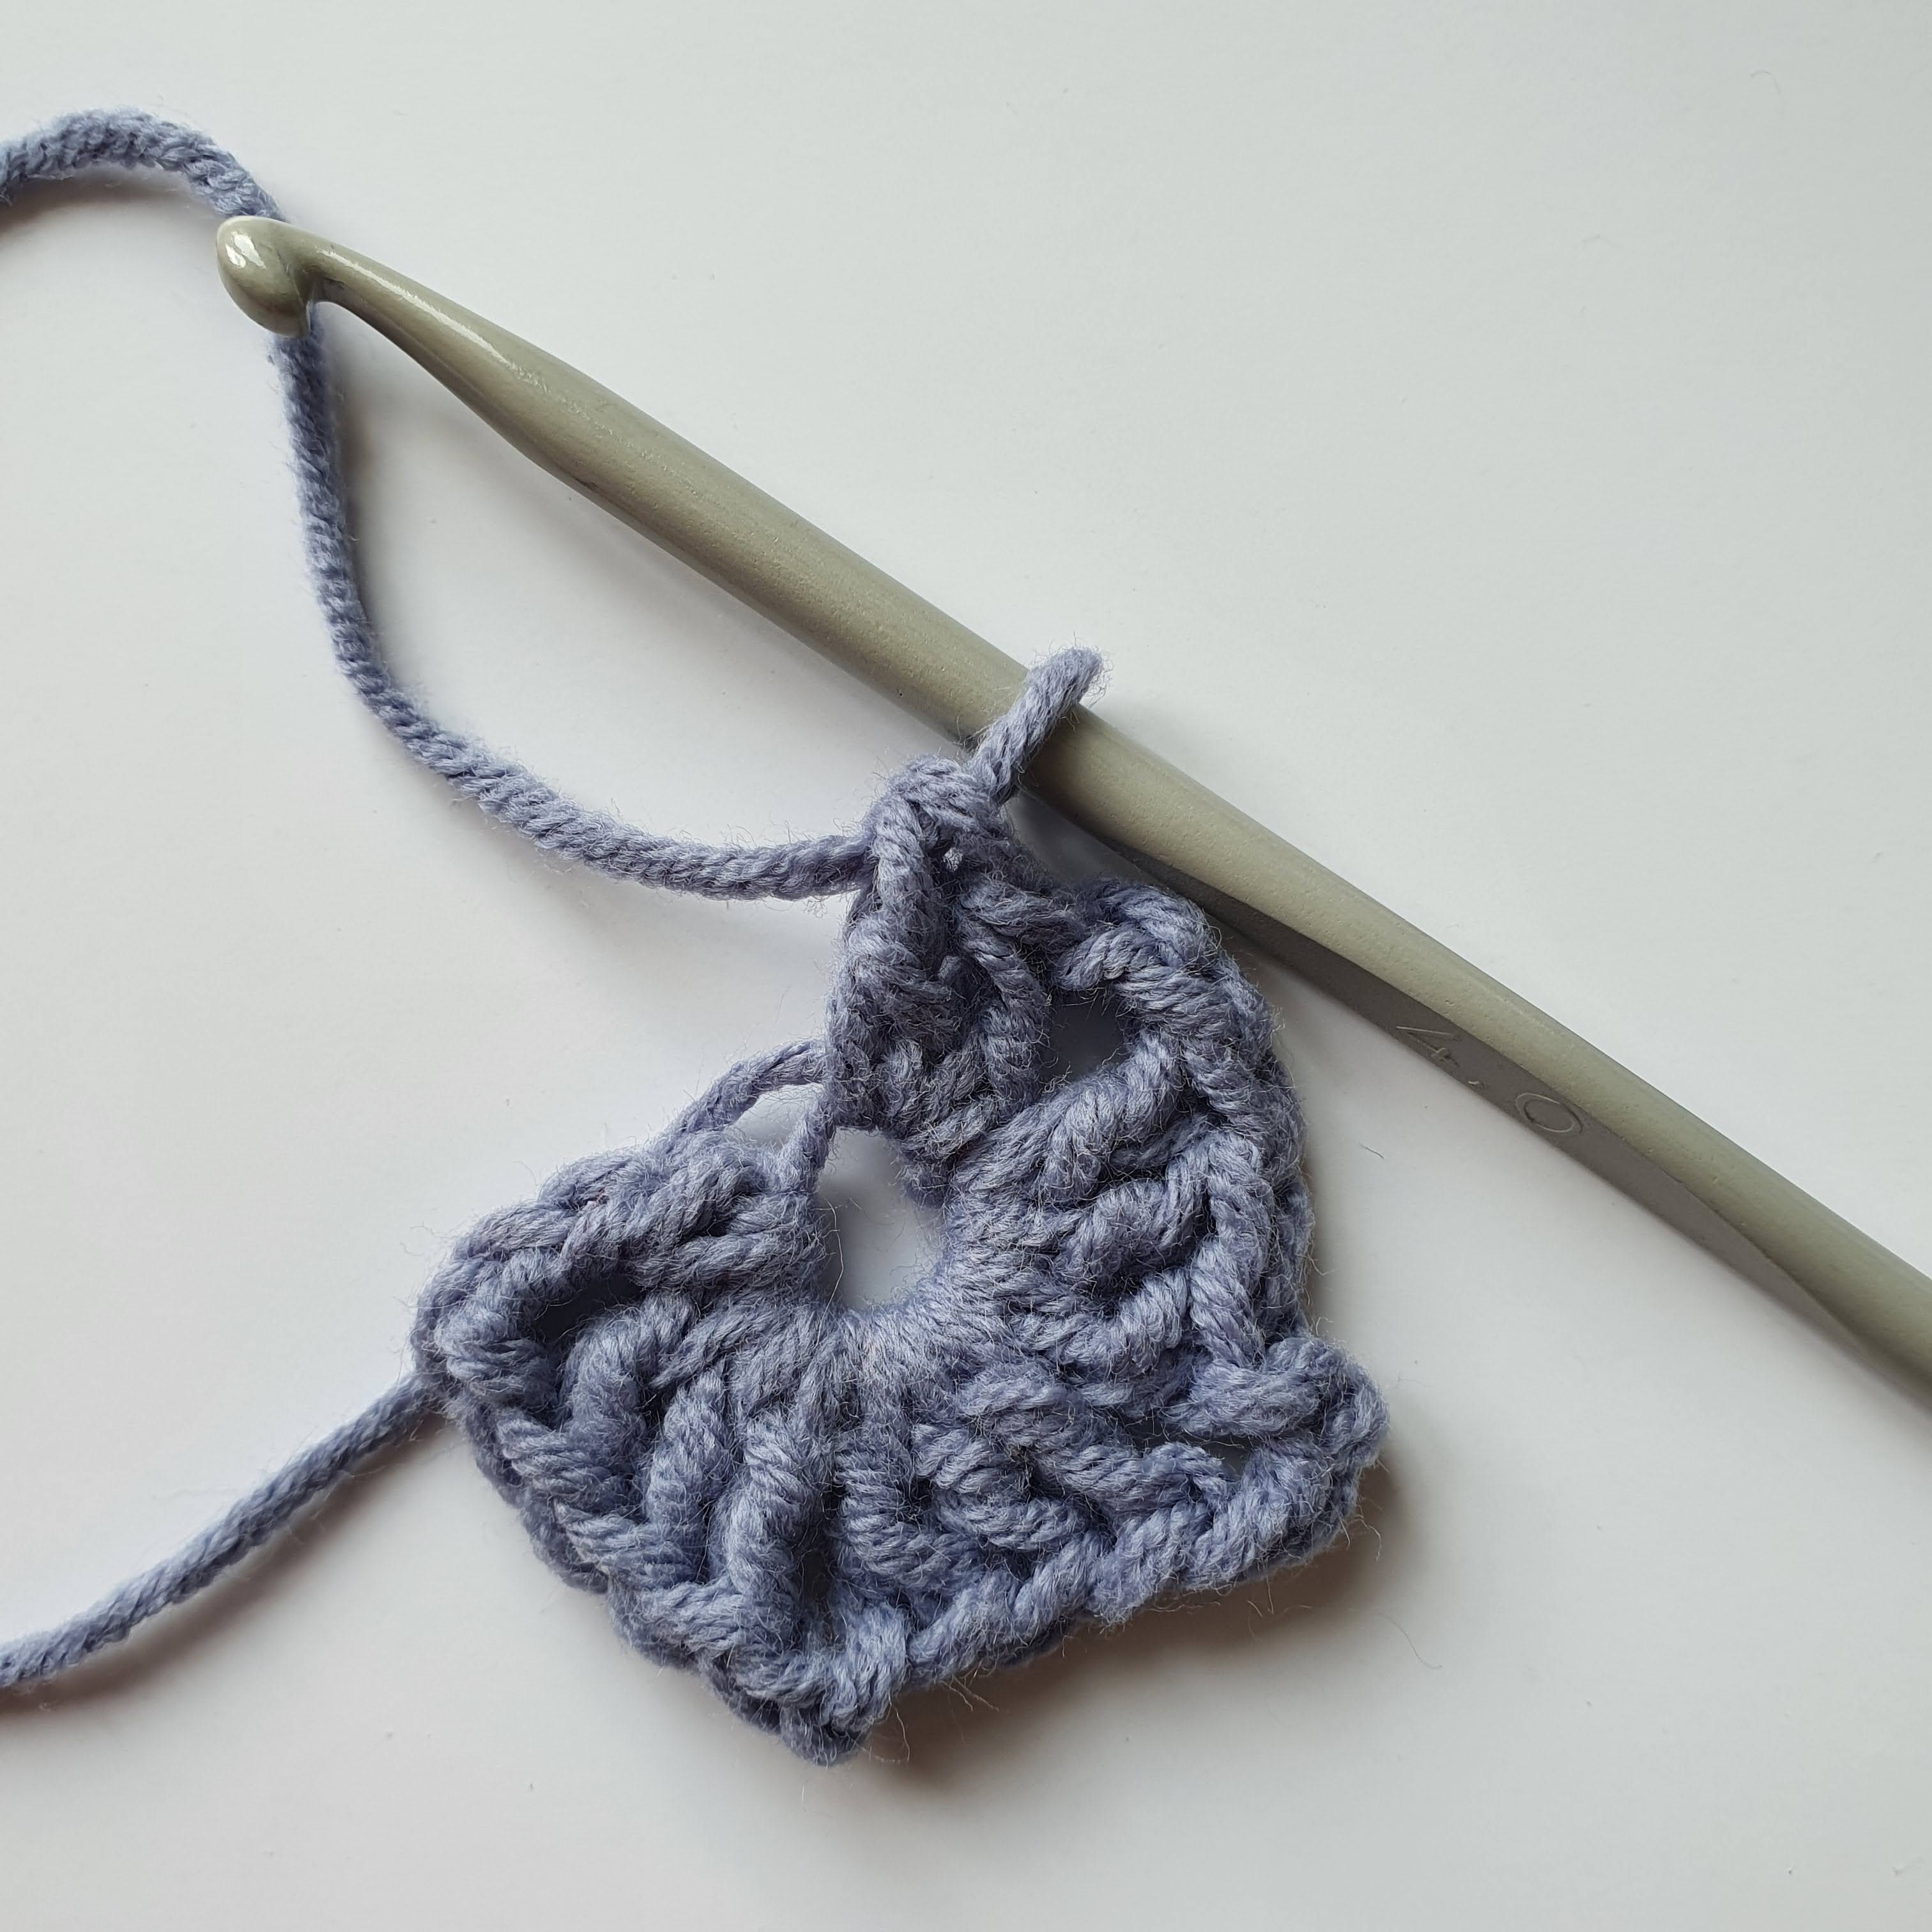
5. Repeat this 2 more times. After this you make 2 dc in the ring. You now have: 1 begin dc, 2 ch, 3 dc, 2 ch, 3 dc, 2 ch, 3 dc, 2 ch, 2 dc.
5. Herhaal dit nog 2 keer. Hierna haak je 2 stokjes. In totaal heb je nu: 1 begin stokje, 2 lossen, 3 stokjes, 2 lossen, 3 stokjes, 2 lossen, 3 stokjes, 2 lossen, 2 stokjes.
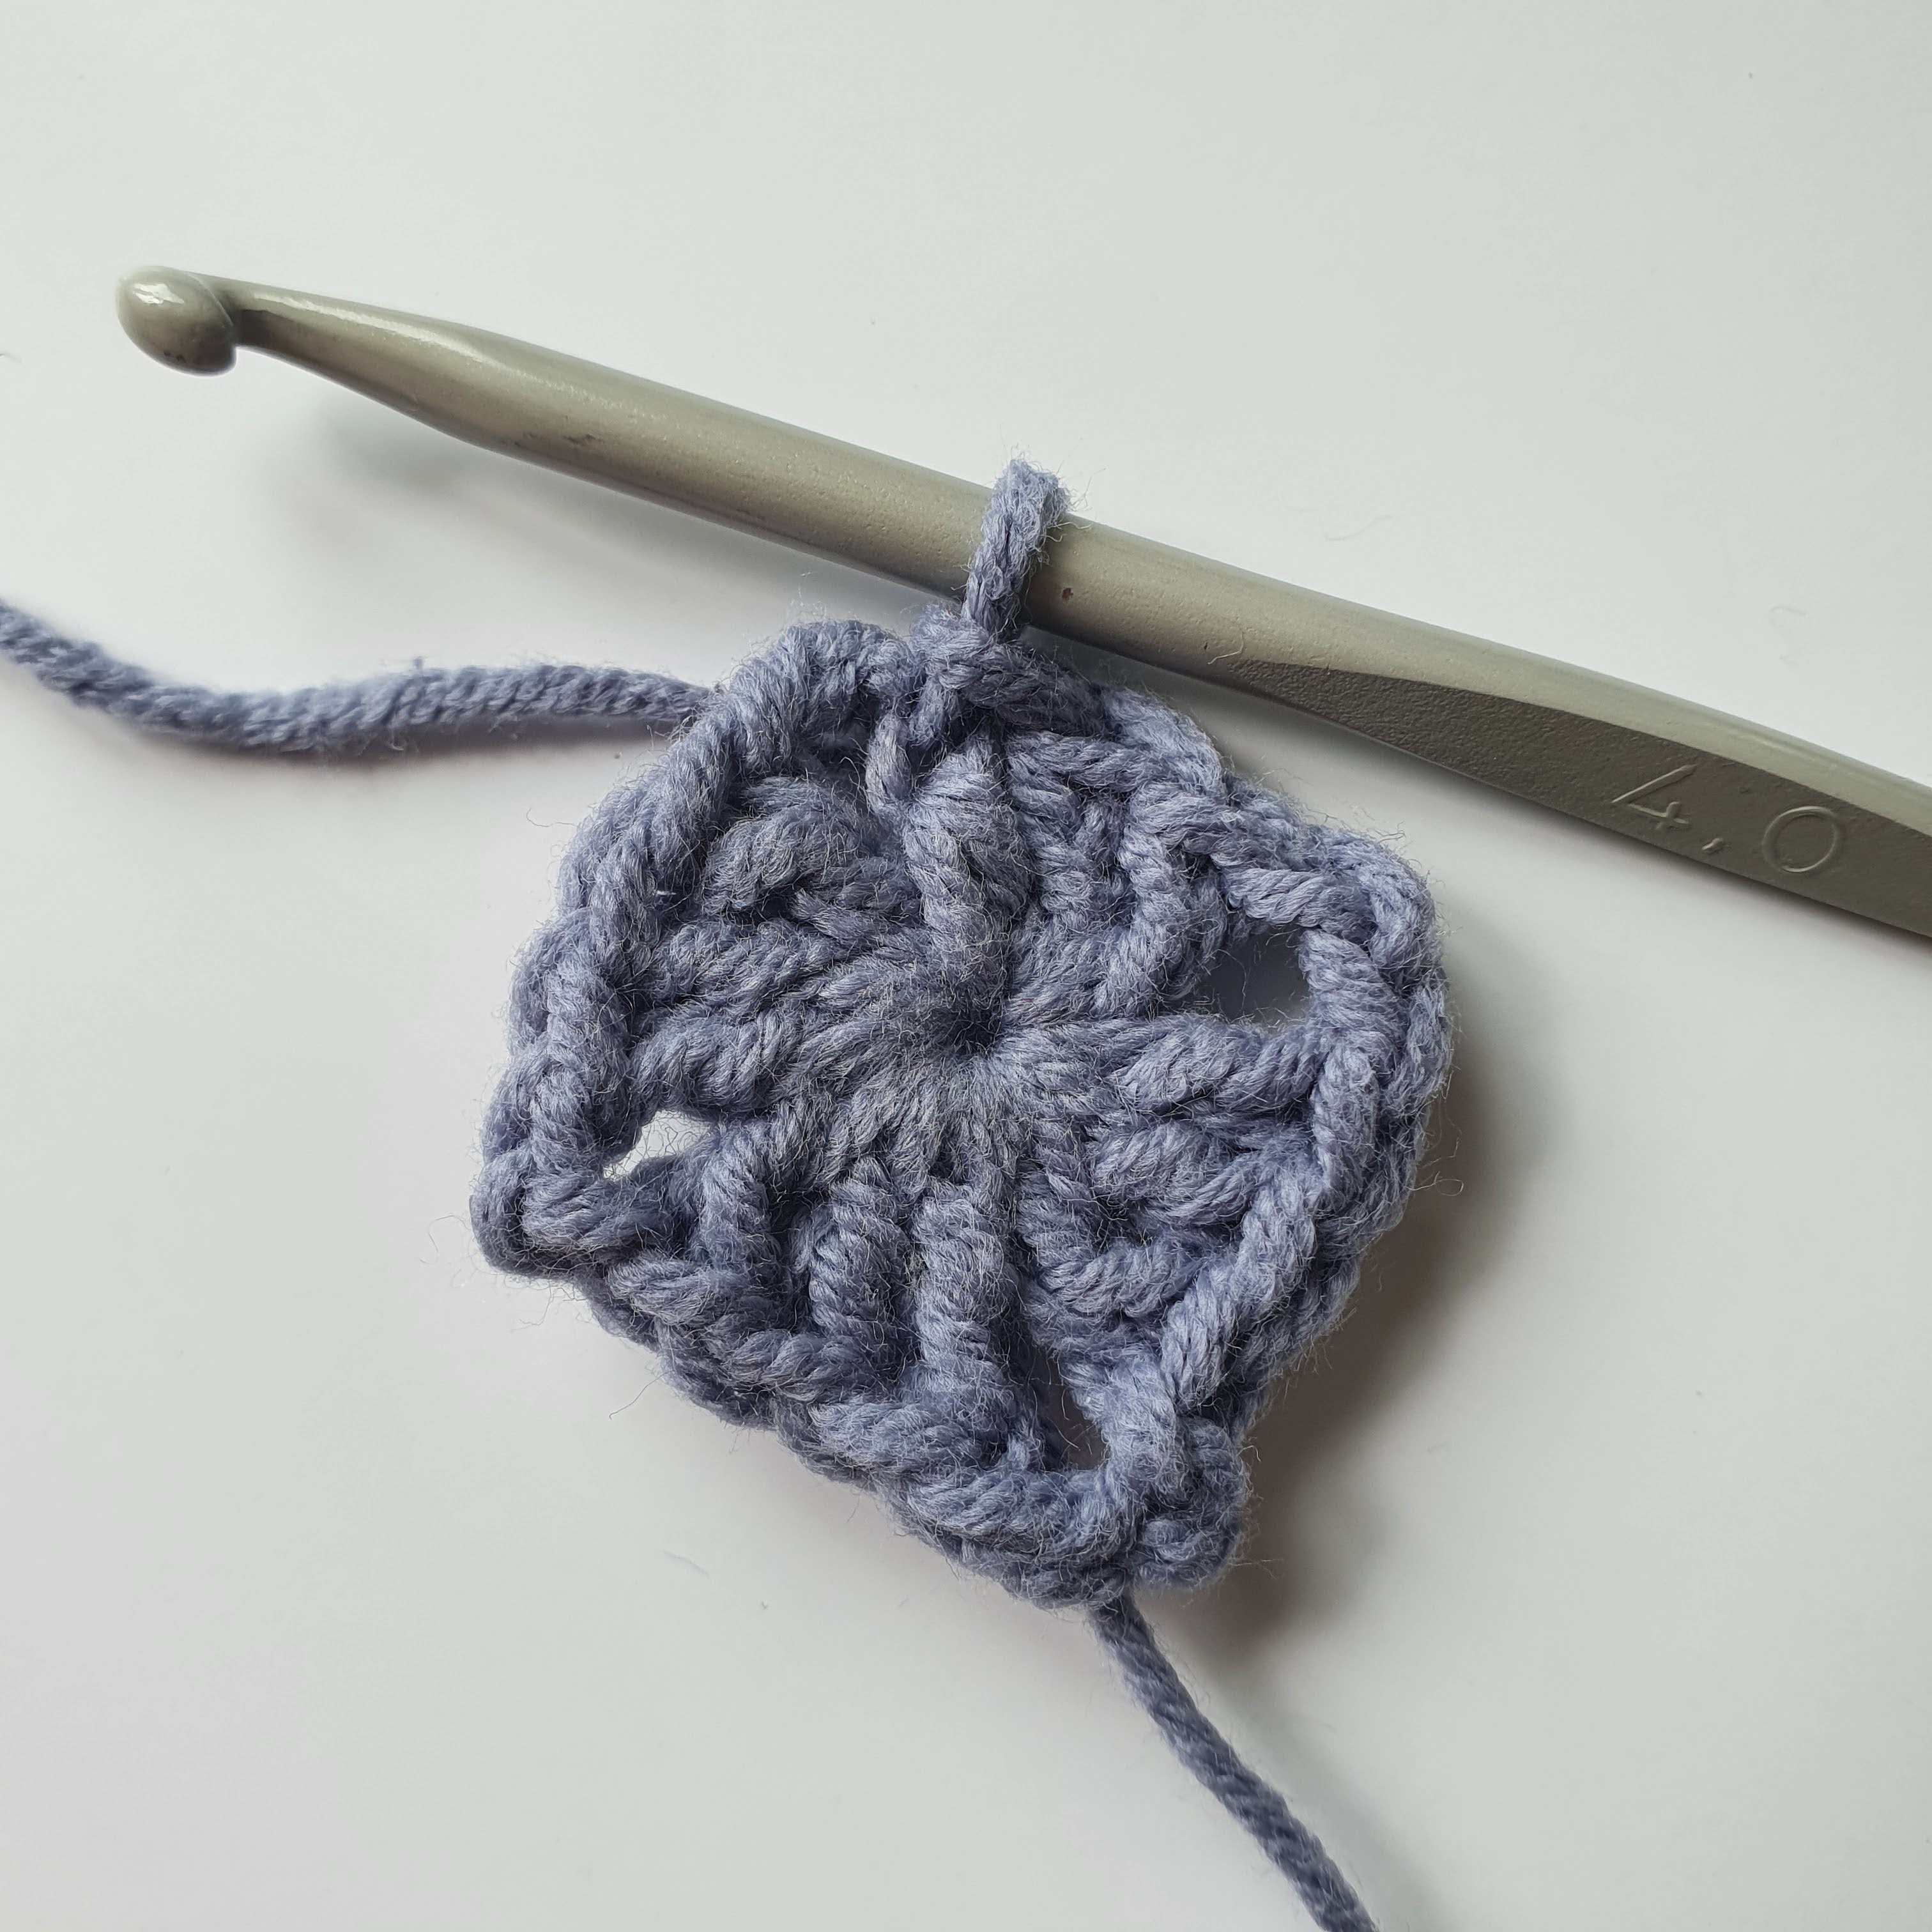
6. Make an ss in the first of the 3 chains
6. Maak een halve vaste in de 1e van de 3 lossen
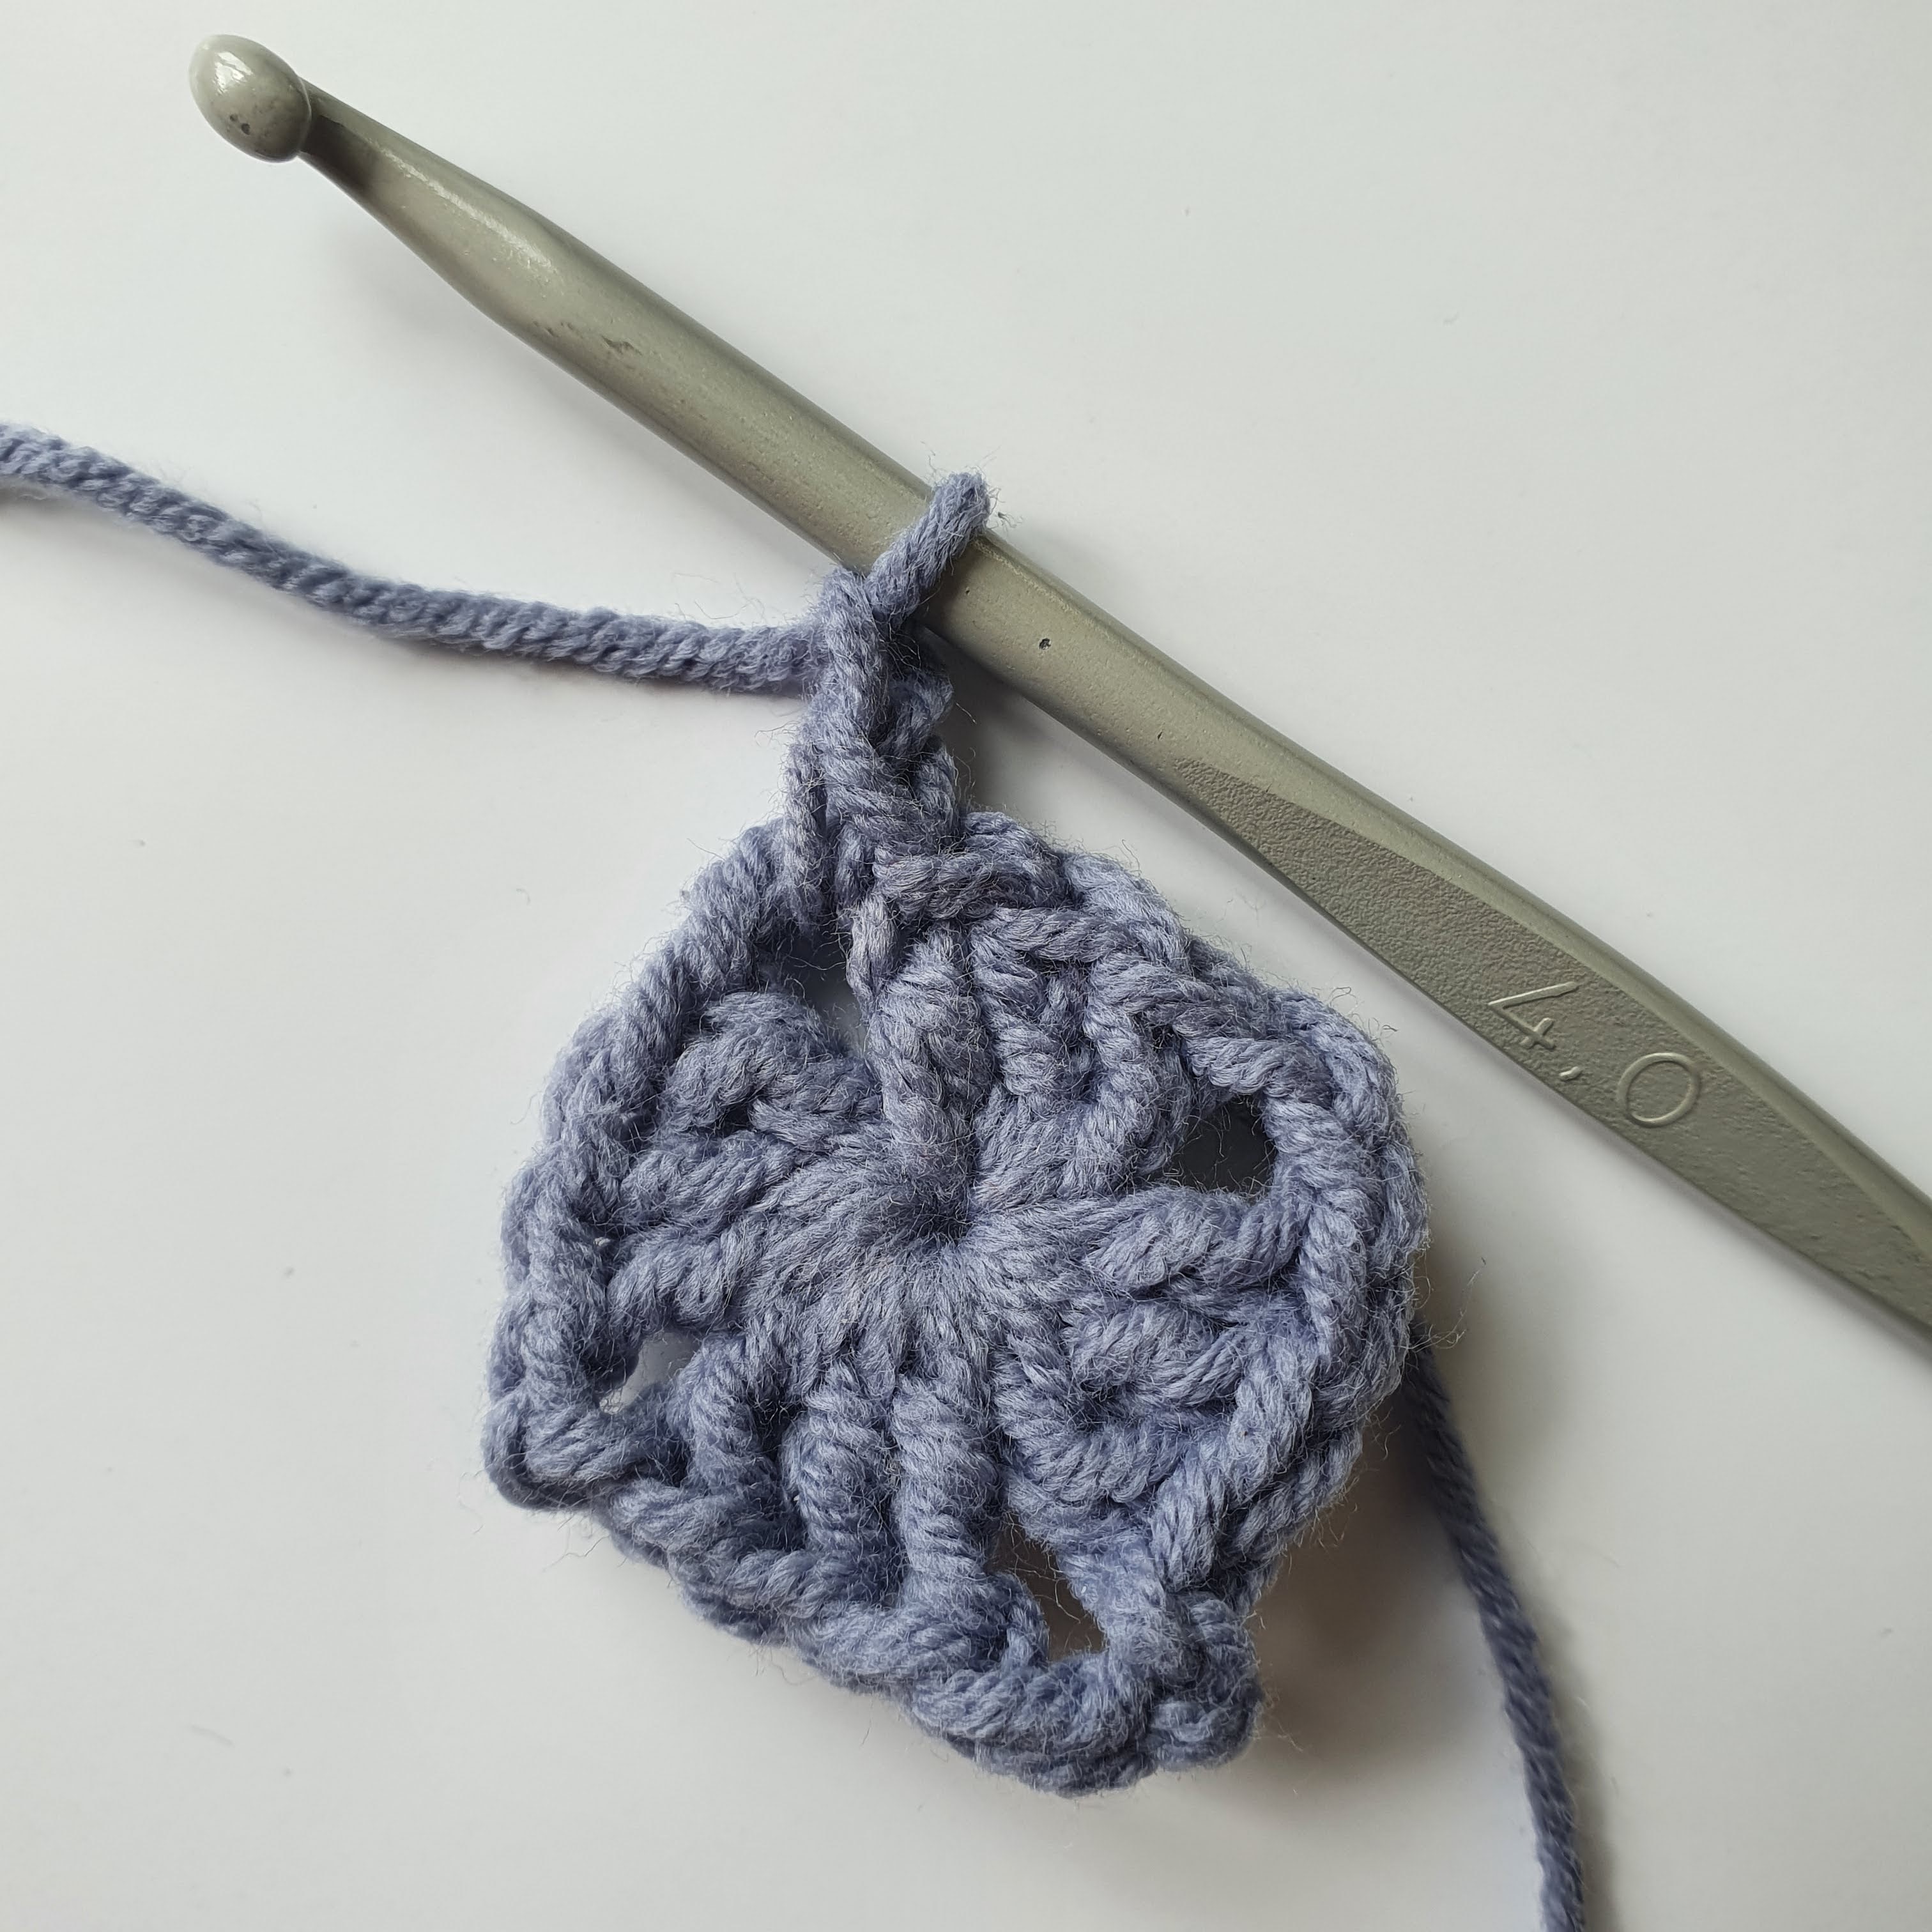
7. Make an sc in the chainspace followed by 3 chains
7. Maak een vaste in de lossenruimte en daarna 3 lossen
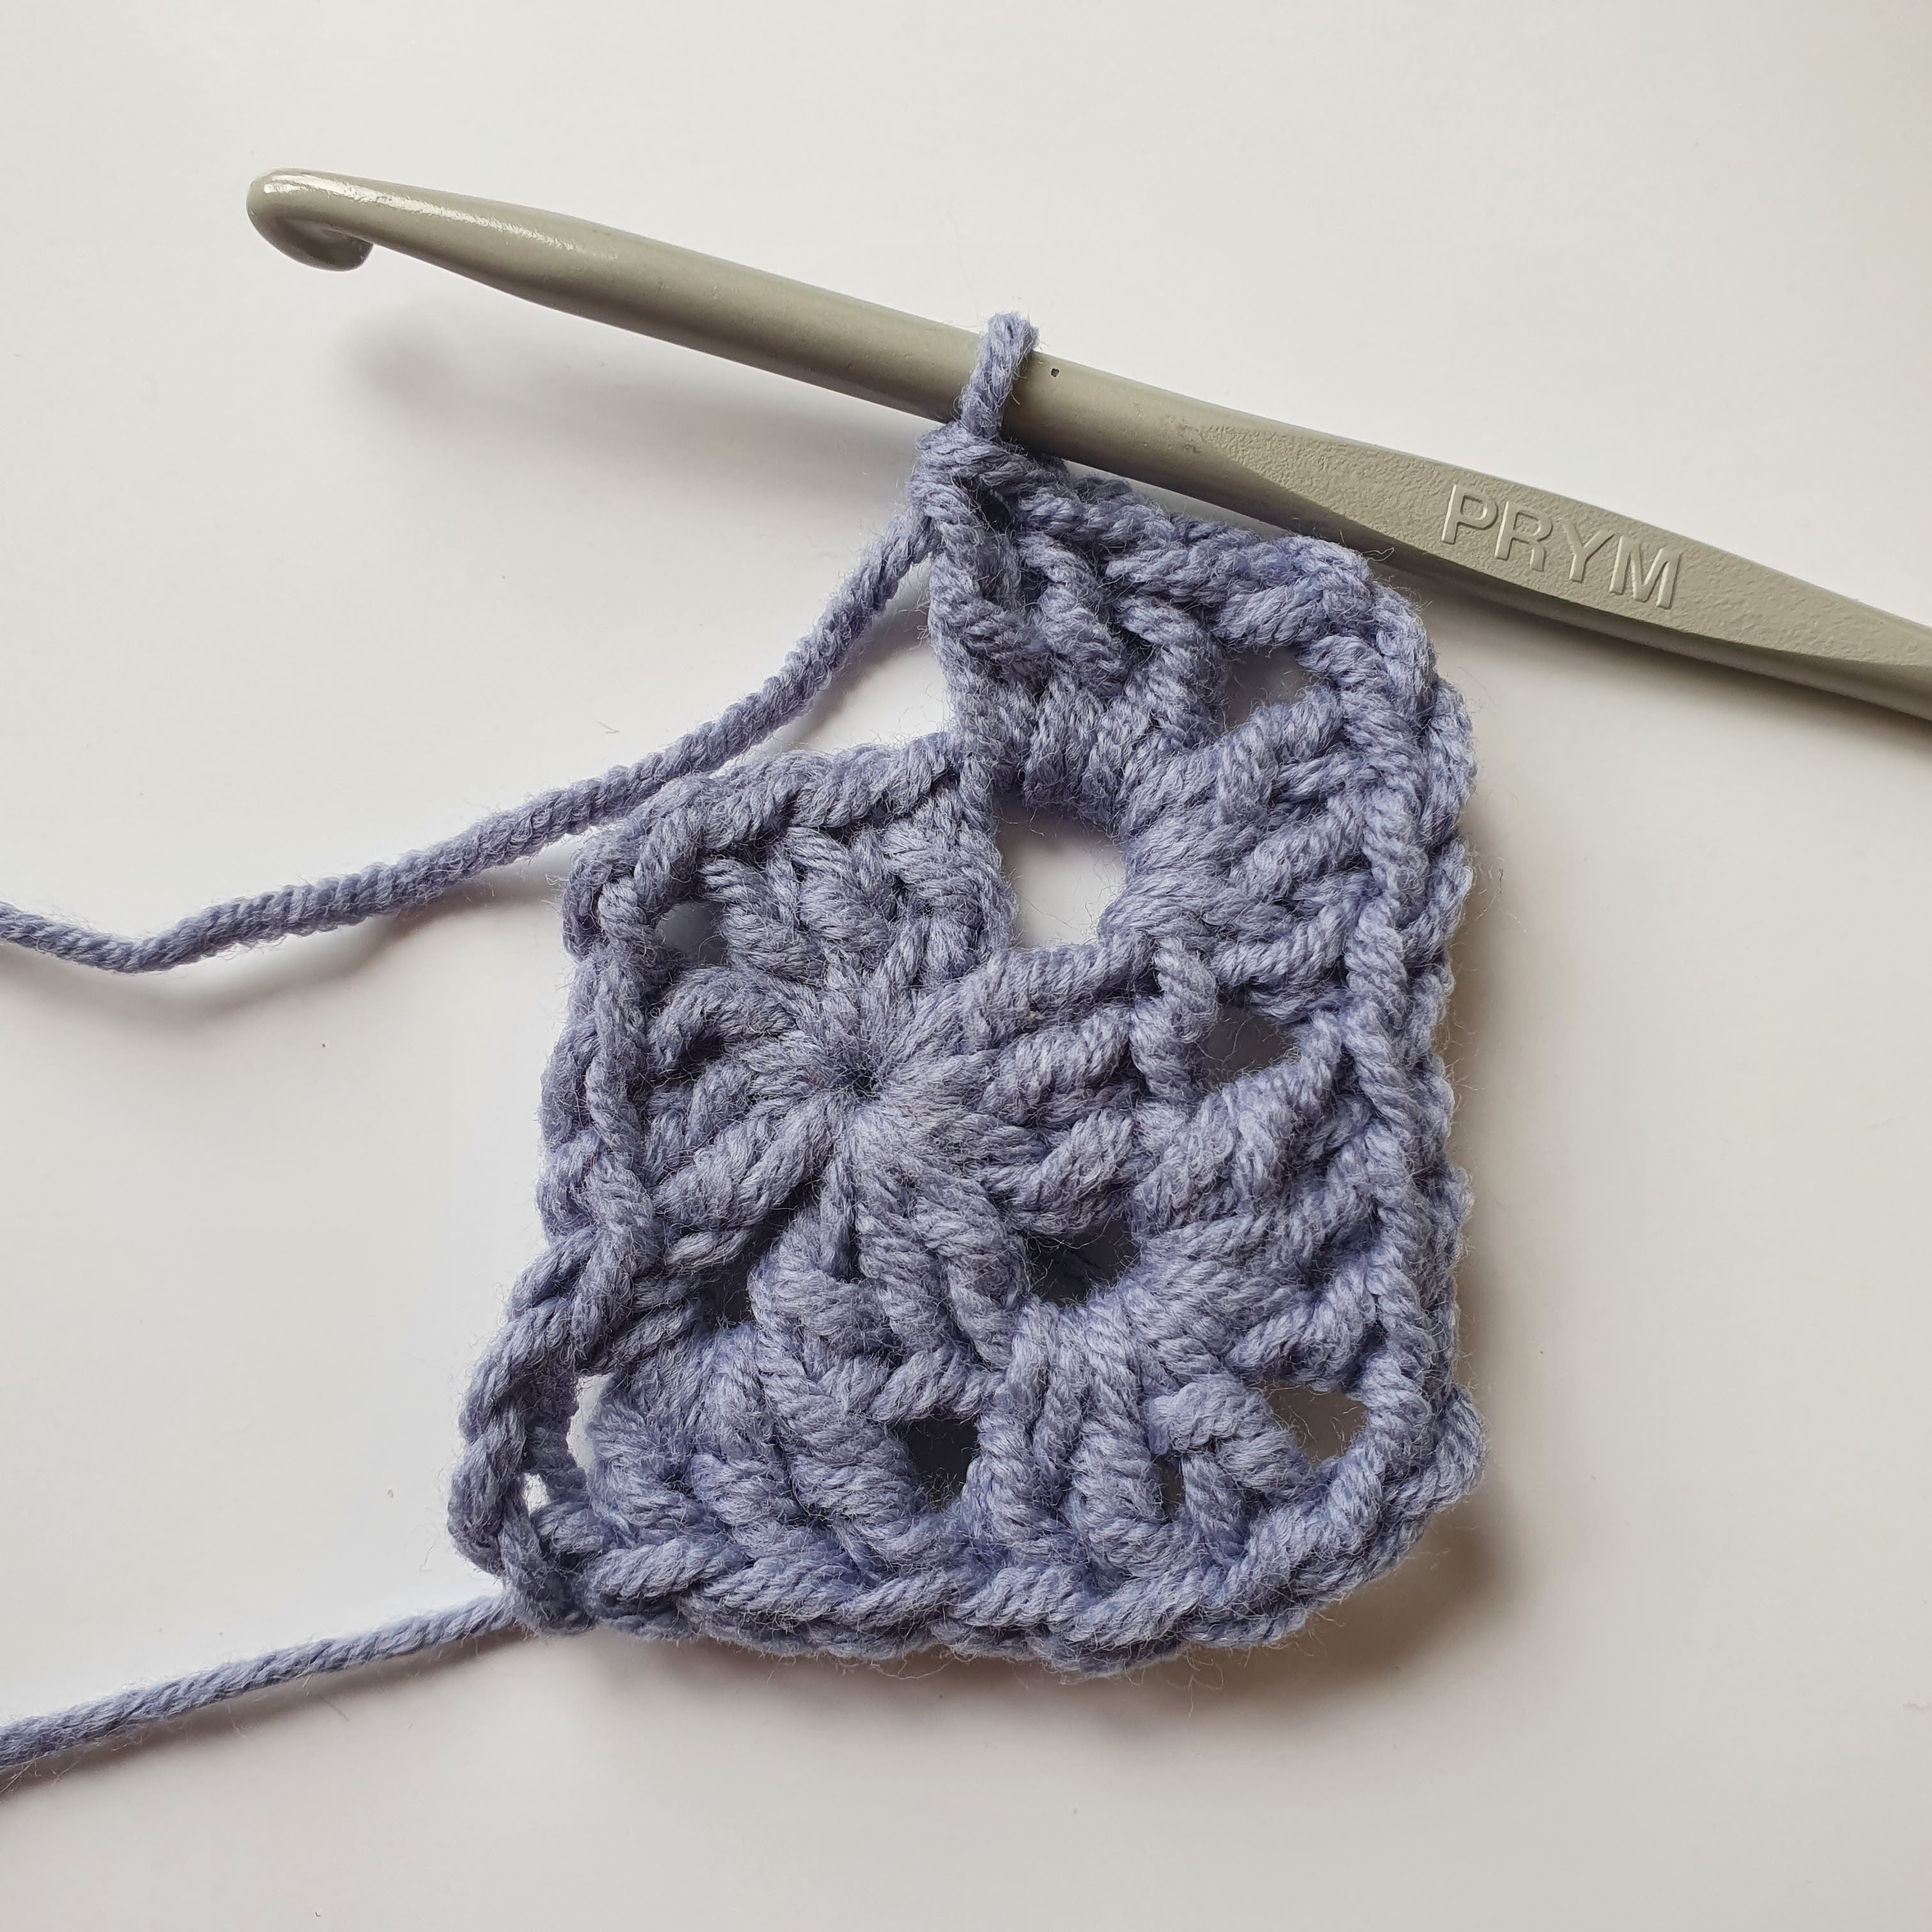
8. Make 3 dc in every space between 2 groups of 3 dc, in the corner chainspaces you make 3 dc, 2 ch, 3 dc.
8. Maak 3 stokjes in elke ruimte tussen 2 groepjes van 3 stokjes en in elke lossenruimte. In de lossenruimtes in de hoeken haak je 3 stokjes, 2 losse, 3 stokjes
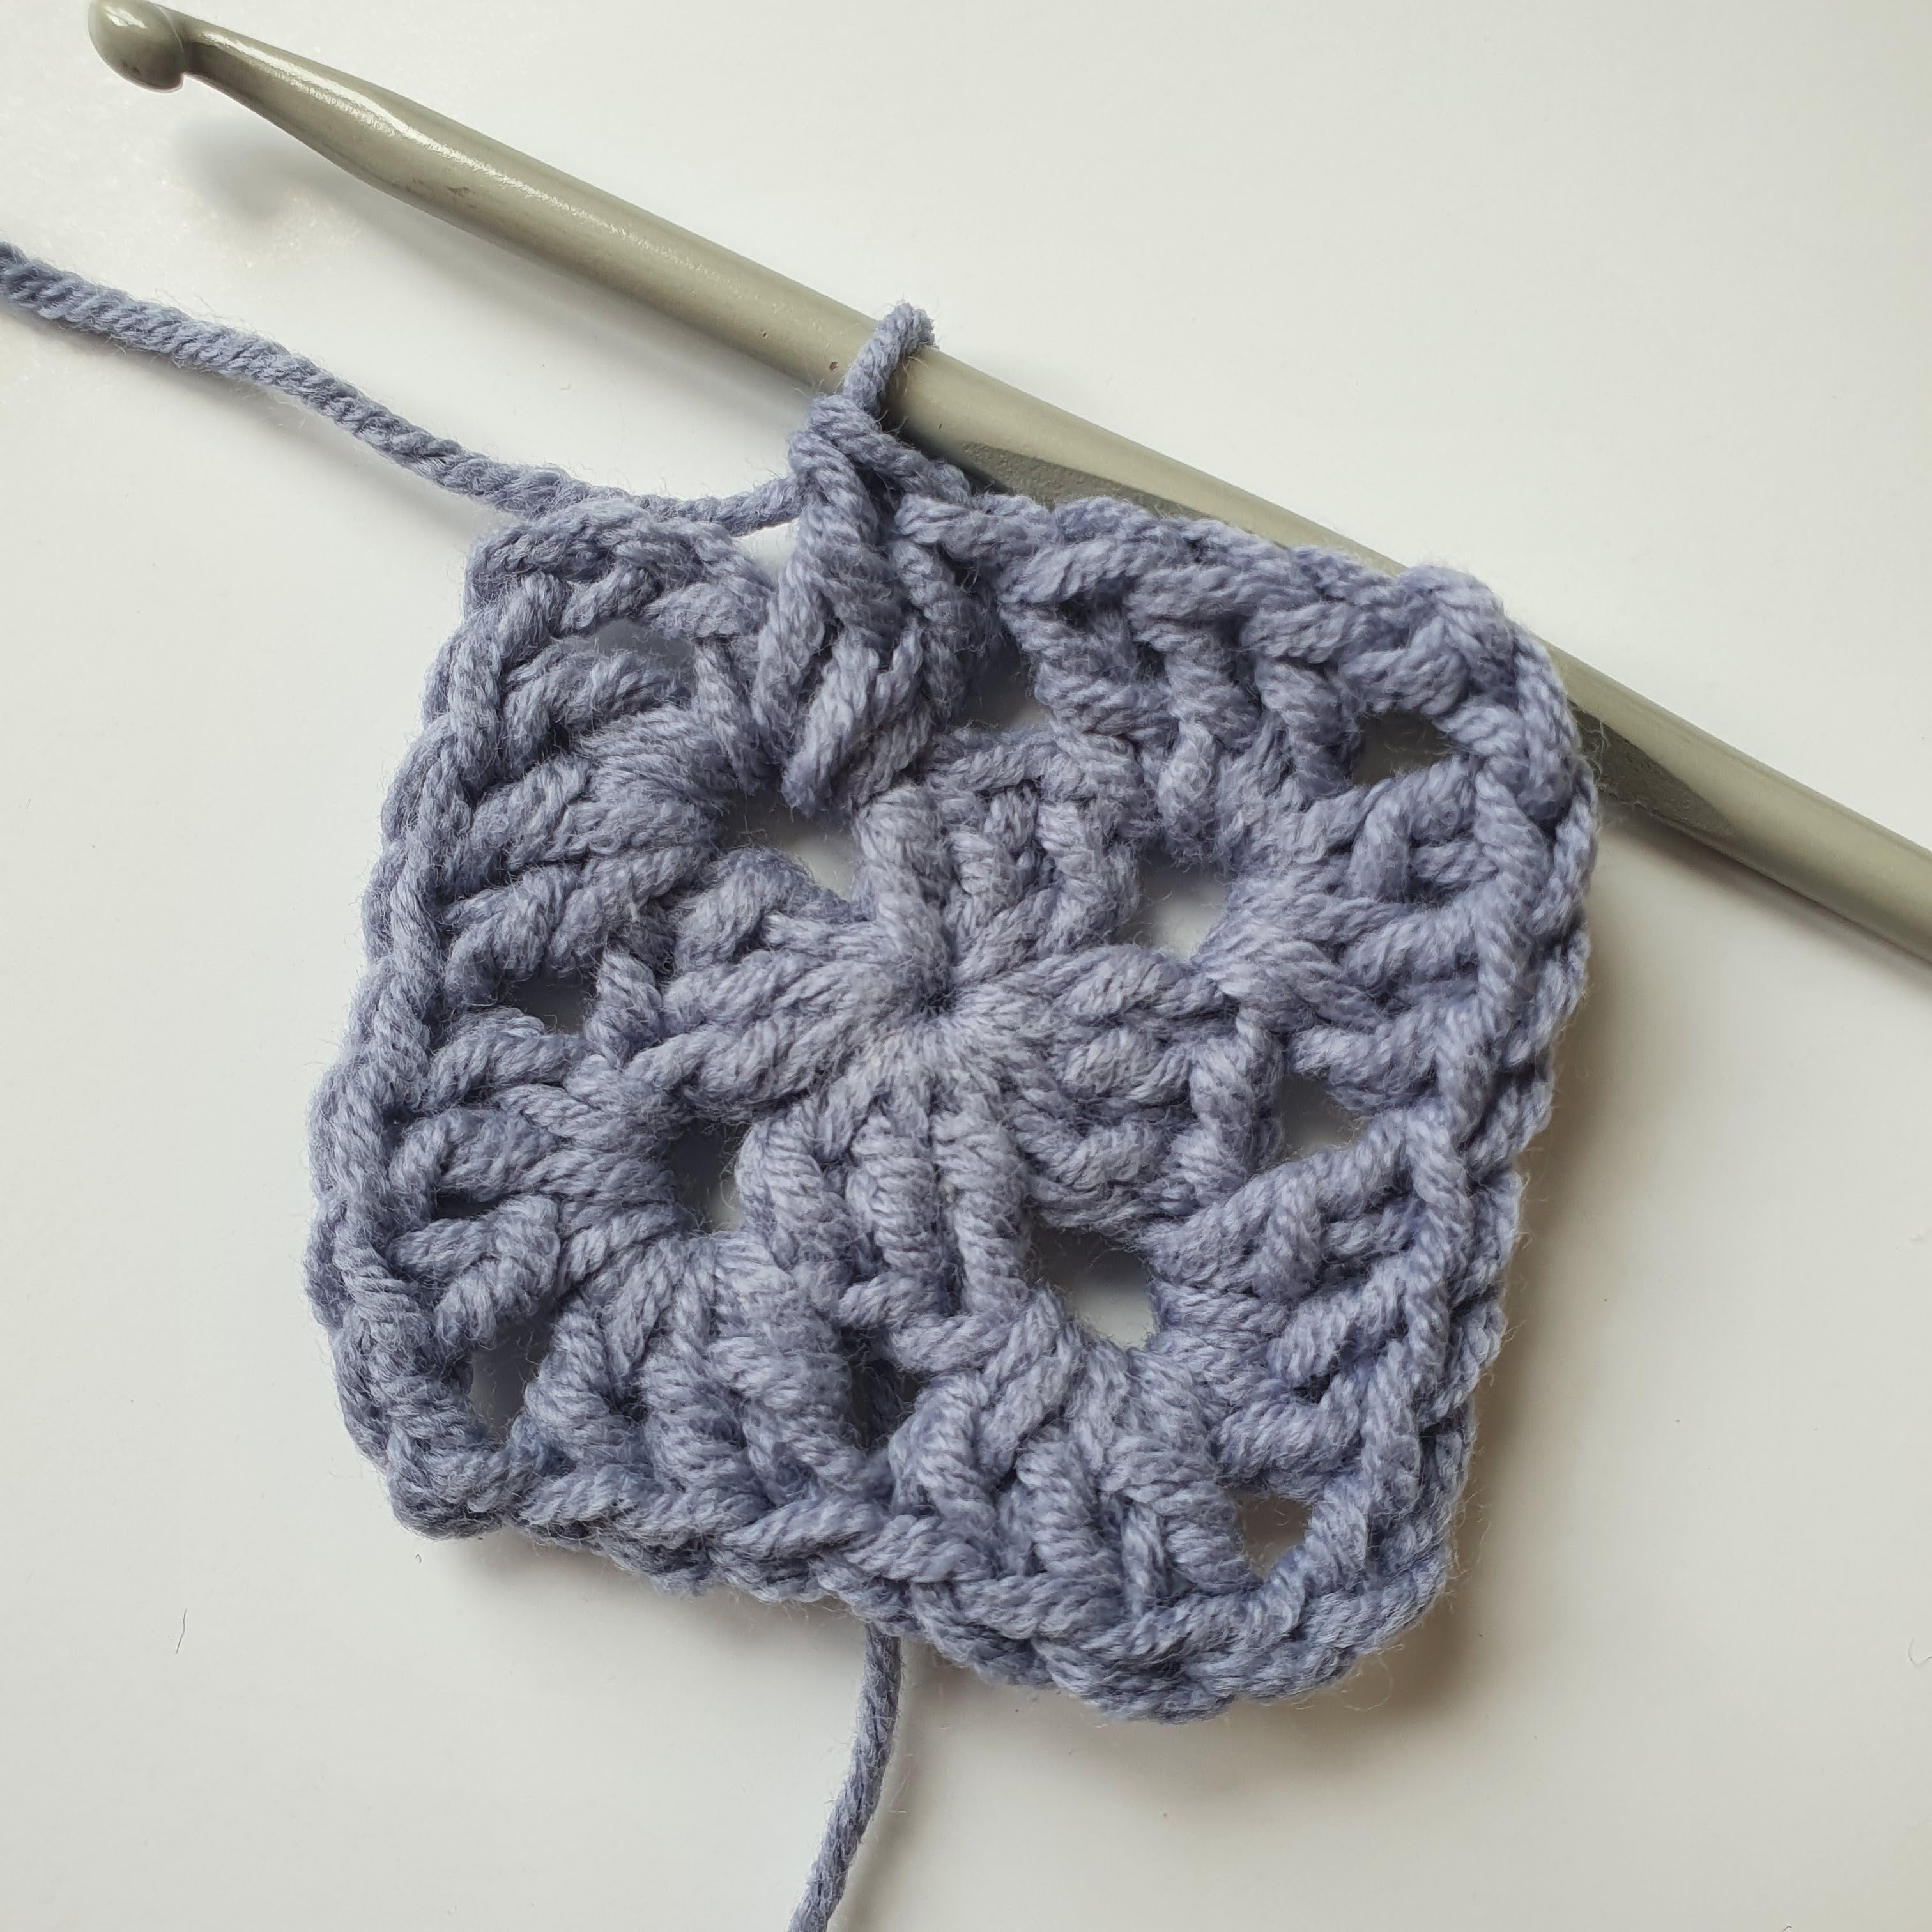
9. In the chainspace where you made your begin-dc you make 2 more dc. When you want to continue in the same colour, return to step 6 and repeat. If you want to close the square or continue with a different colour, continue with step 10.
9. In de lossenruimte waar je begonnen bent maak je nog 2 stokjes. Wanneer je verder wilt gaat met het vierkant in deze kleur ga je terug naar stap 6. Wanneer het vierkant klaar is of je wilt verder in een andere kleur kun je verder gaan met stap 10.
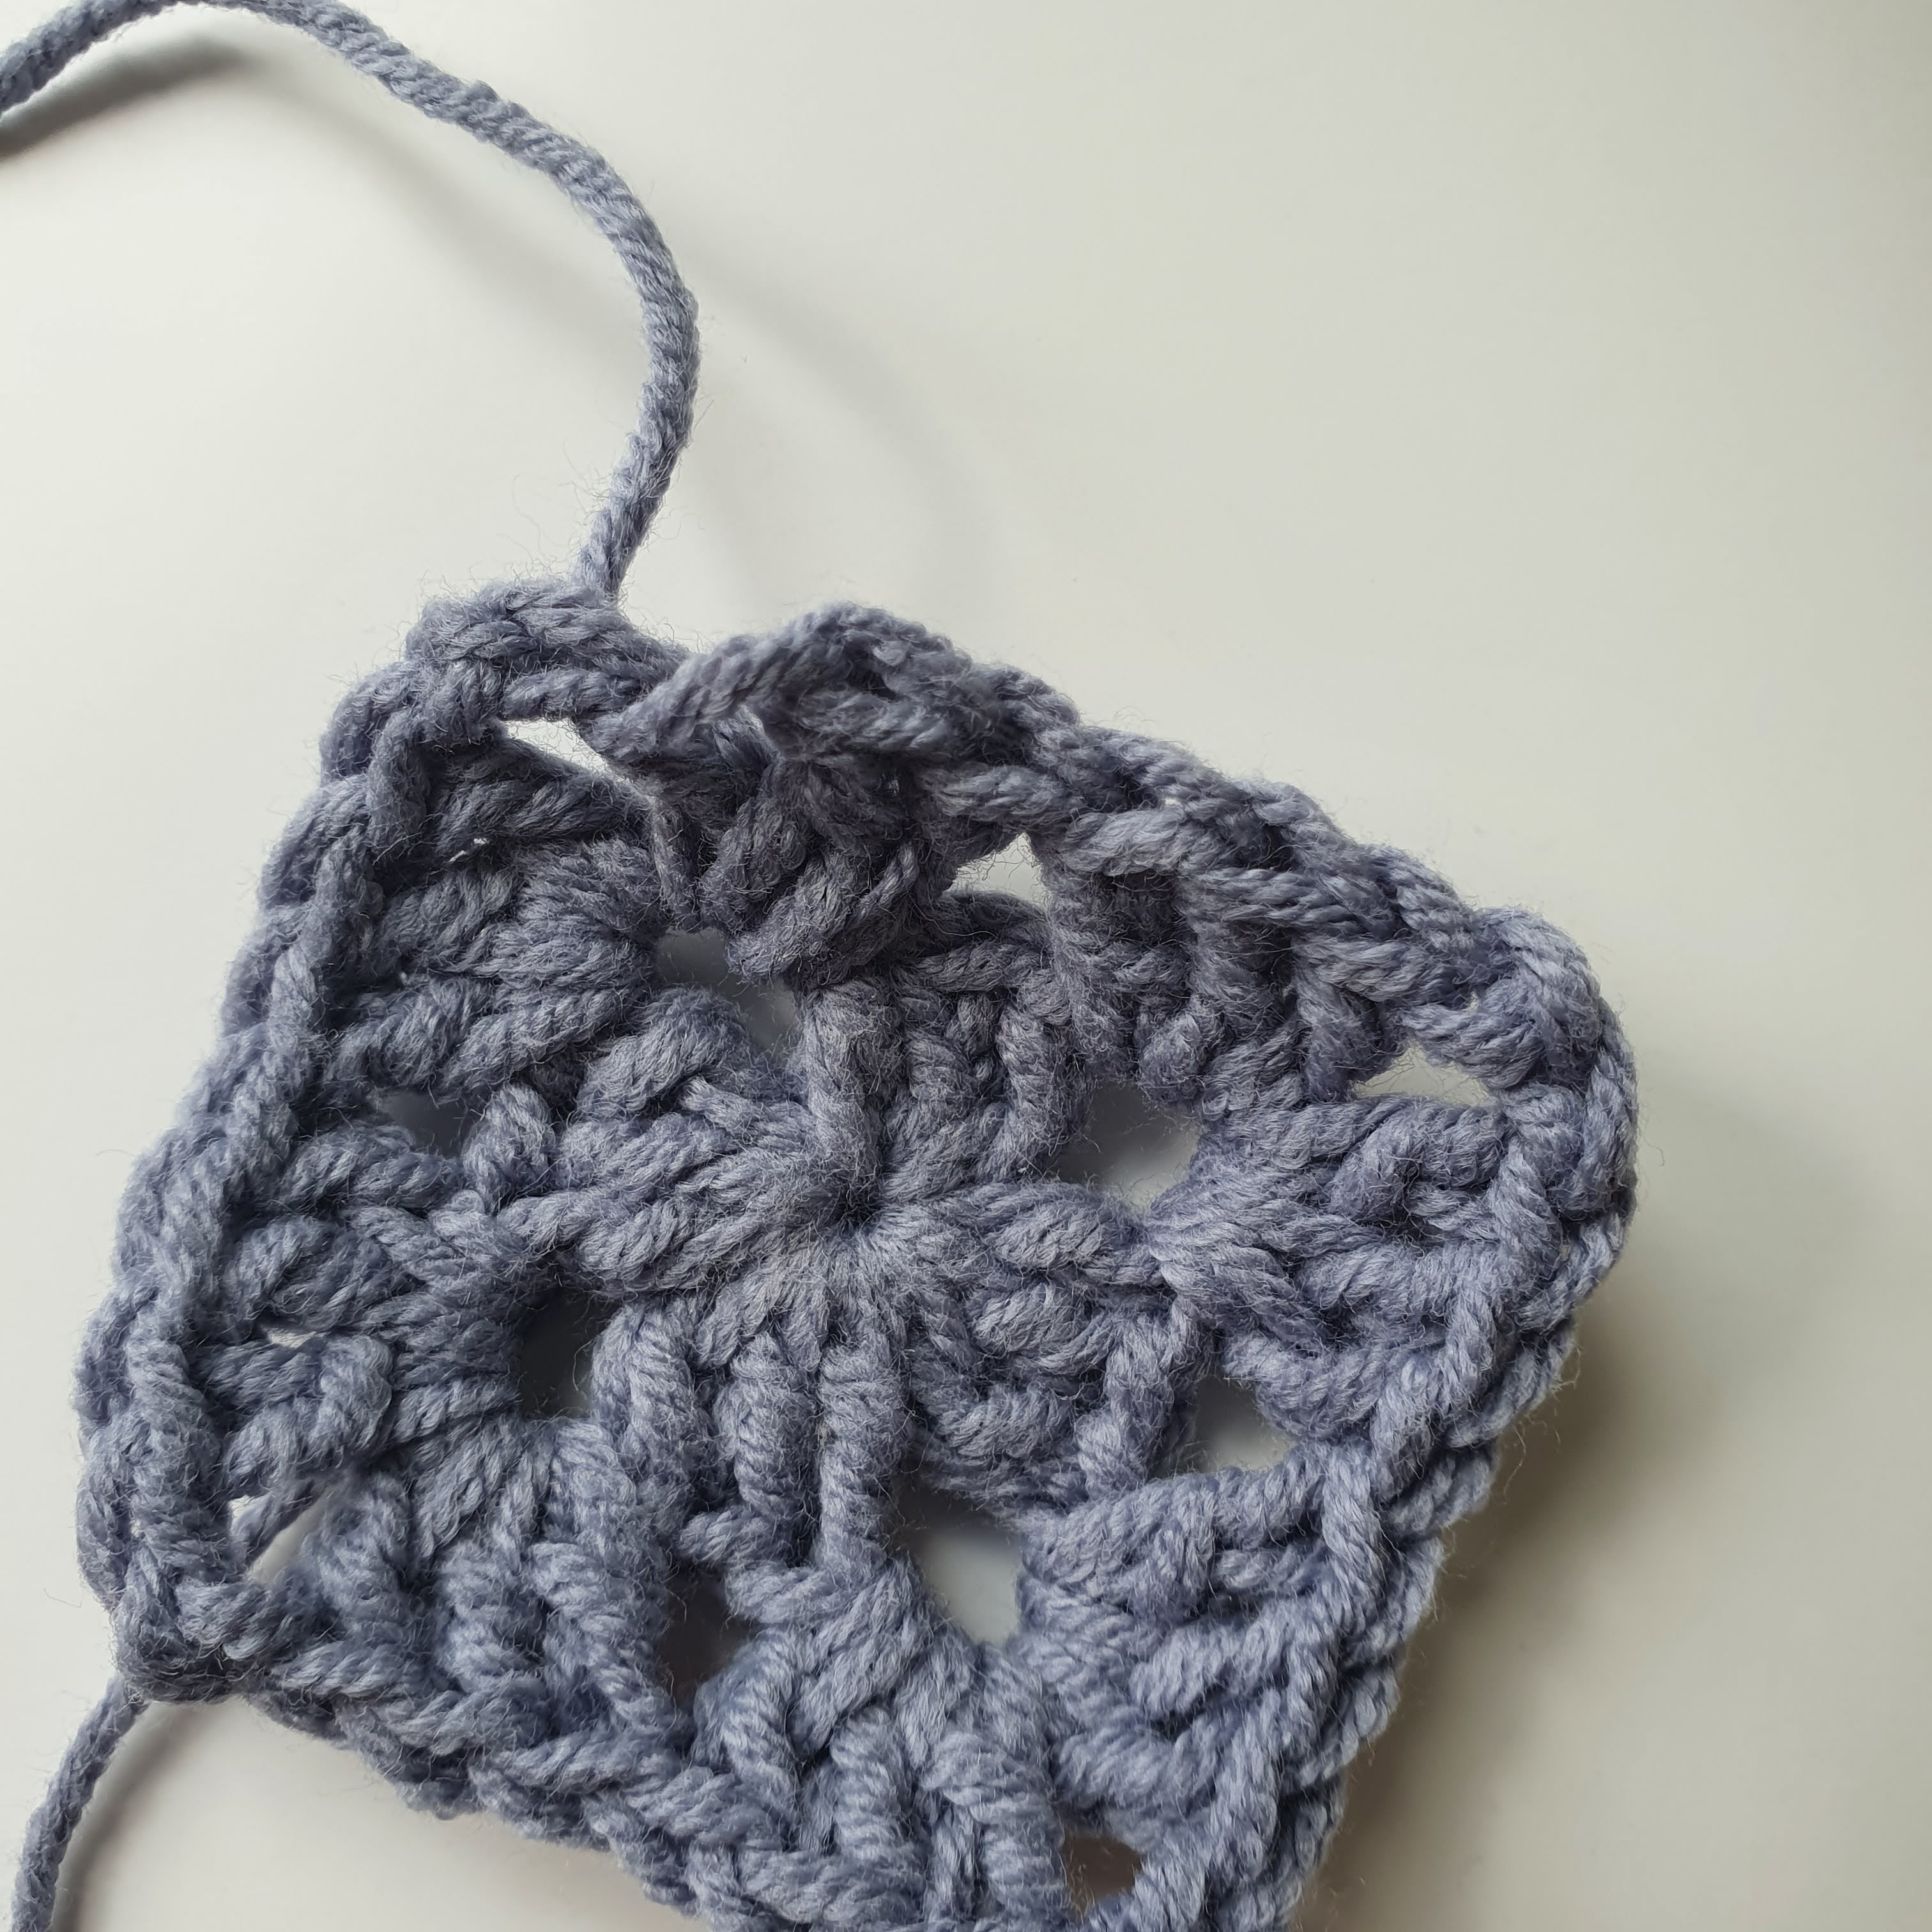
10. I always close the round completely with the old colour before starting with a new colour. For closing the round: cut the yarn leaving a tail and pull it completely through.
10. Ik sluit de ronde altijd helemaal voordat ik doorga met een nieuwe kleur. Kwestie van smaak waarschijnlijk maar ik vind dat het ondanks het extra werk een mooi resultaat geeft. Knip het garen af en trek het helemaal door de steek heen.
11. Using a tapestry needle, weave the thread through the second chain and then back through the stitch of the last dc you made.
11. Met een naald haal je de draad door de 2e losse en dan terug van boven naar beneden door de steek van het laatste stokje dat je hebt gemaakt.
12. On the backside of your work it will look like this. With the needle again, pull the thread up again through the chain and the stitch (see the arrow on the photo)
12. Aan de achterkant ziet het er dan zo uit. Met de naald haal je vervolgens de draad van beneden naar boven door de losse en de steek op de plek van de pijl.
13. Back to the front it looks like this. Now with the needle, I weave in this end through the stitches.
13. Terug aan de voorkant ziet het er zo uit. Nu kun je met de naald het resterende draadje wegwerken. Ik weef deze door de bovenkant van de steken heen.
14. On this photo I’ve weaved in the end already, you hardly see it and will crochet over it to secure it even more. And best of all: the stitches all look the same!
To continue with a new colour, attach the new colour with a slip stitch on your hook.
14. Op deze foto heb ik de daad door de andere steken geweven: je ziet hem bijna niet meer en je gaat er nog overheen haken. En wat ik het fijnste vindt: de steken zien er allemaal hetzelfde uit, er is niet het 3 lossen – stokje dat je anders zou zien.
Om verder te gaan met een nieuwe kleur zet ik de nieuwe kleur met een opzetlus op mijn haaknaald.
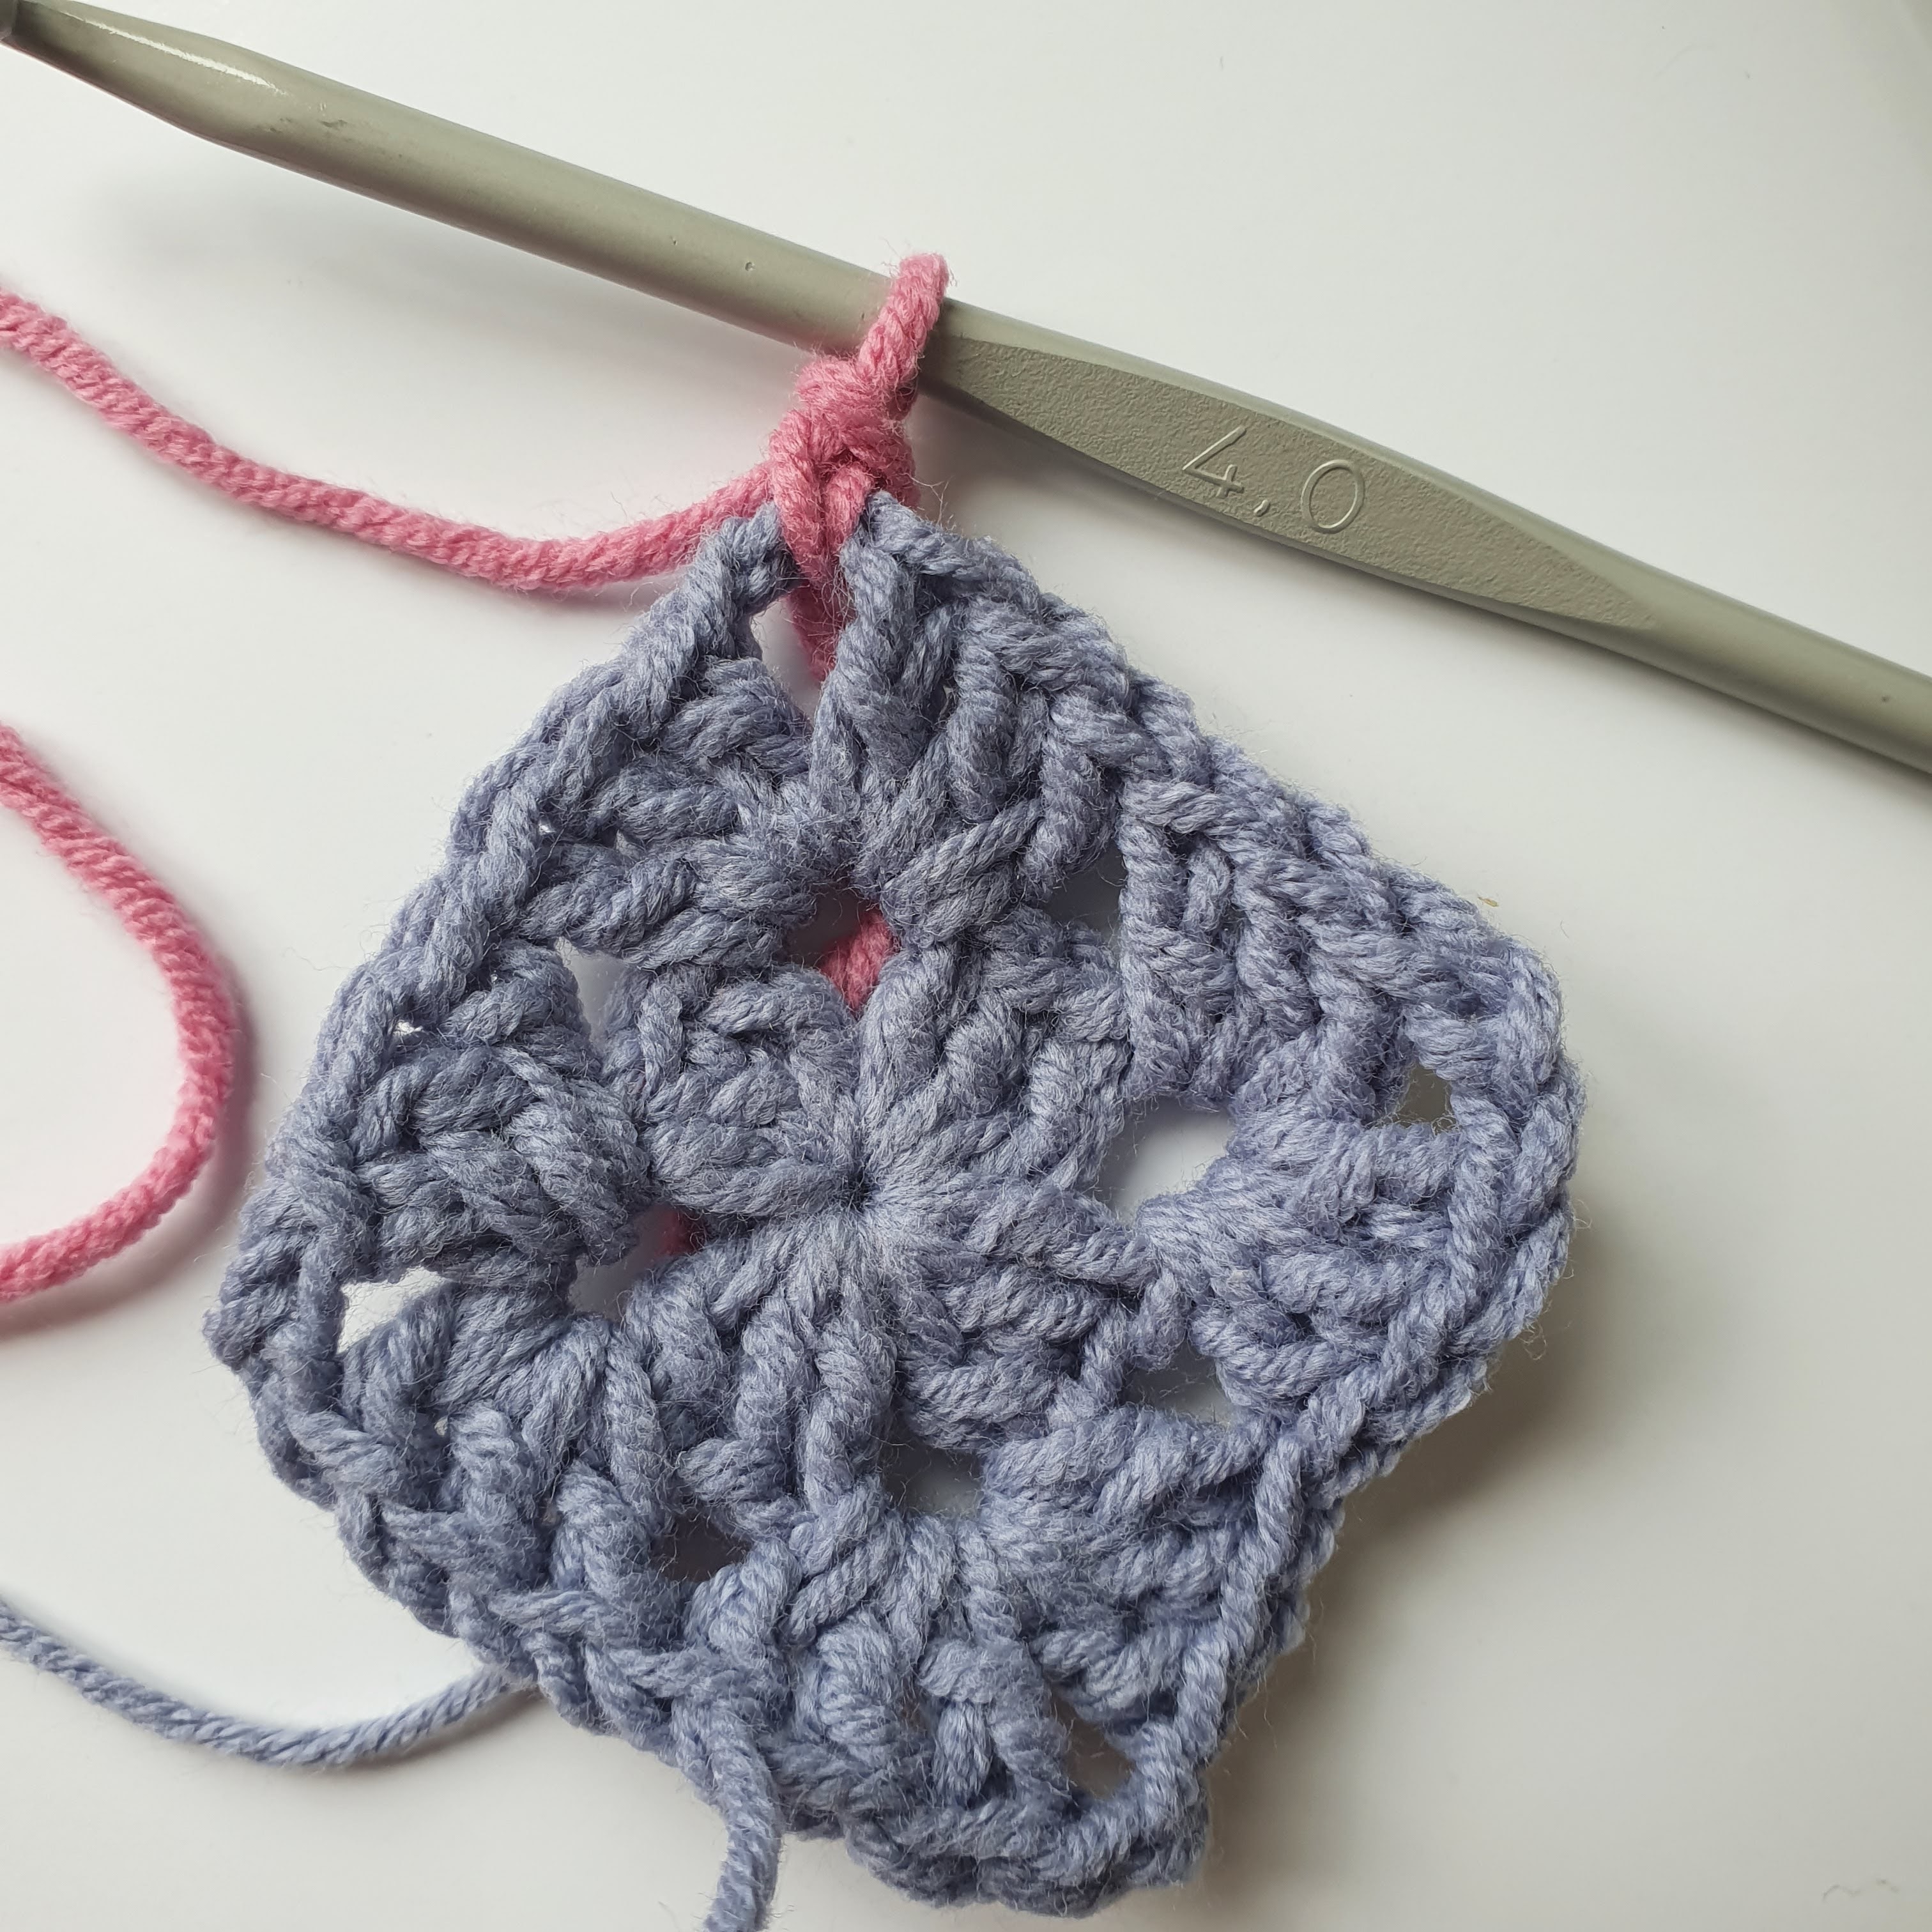
15. With the new colour, make a standing sc. This goes as follows: with the ss on your hook, insert the hook in the chainspace and pull up a loop. Then yarn over and pull through both loops on the hook.
15. Met de nieuwe kleur maak je een staande vaste. Dit doe je als volgt: je hebt de opzetlus op je naald staan. Vervolgens steek je de naald door de lossenruimte en haal je een lus op. Sla de draad om de naald en haal door beide lussen op de naald.
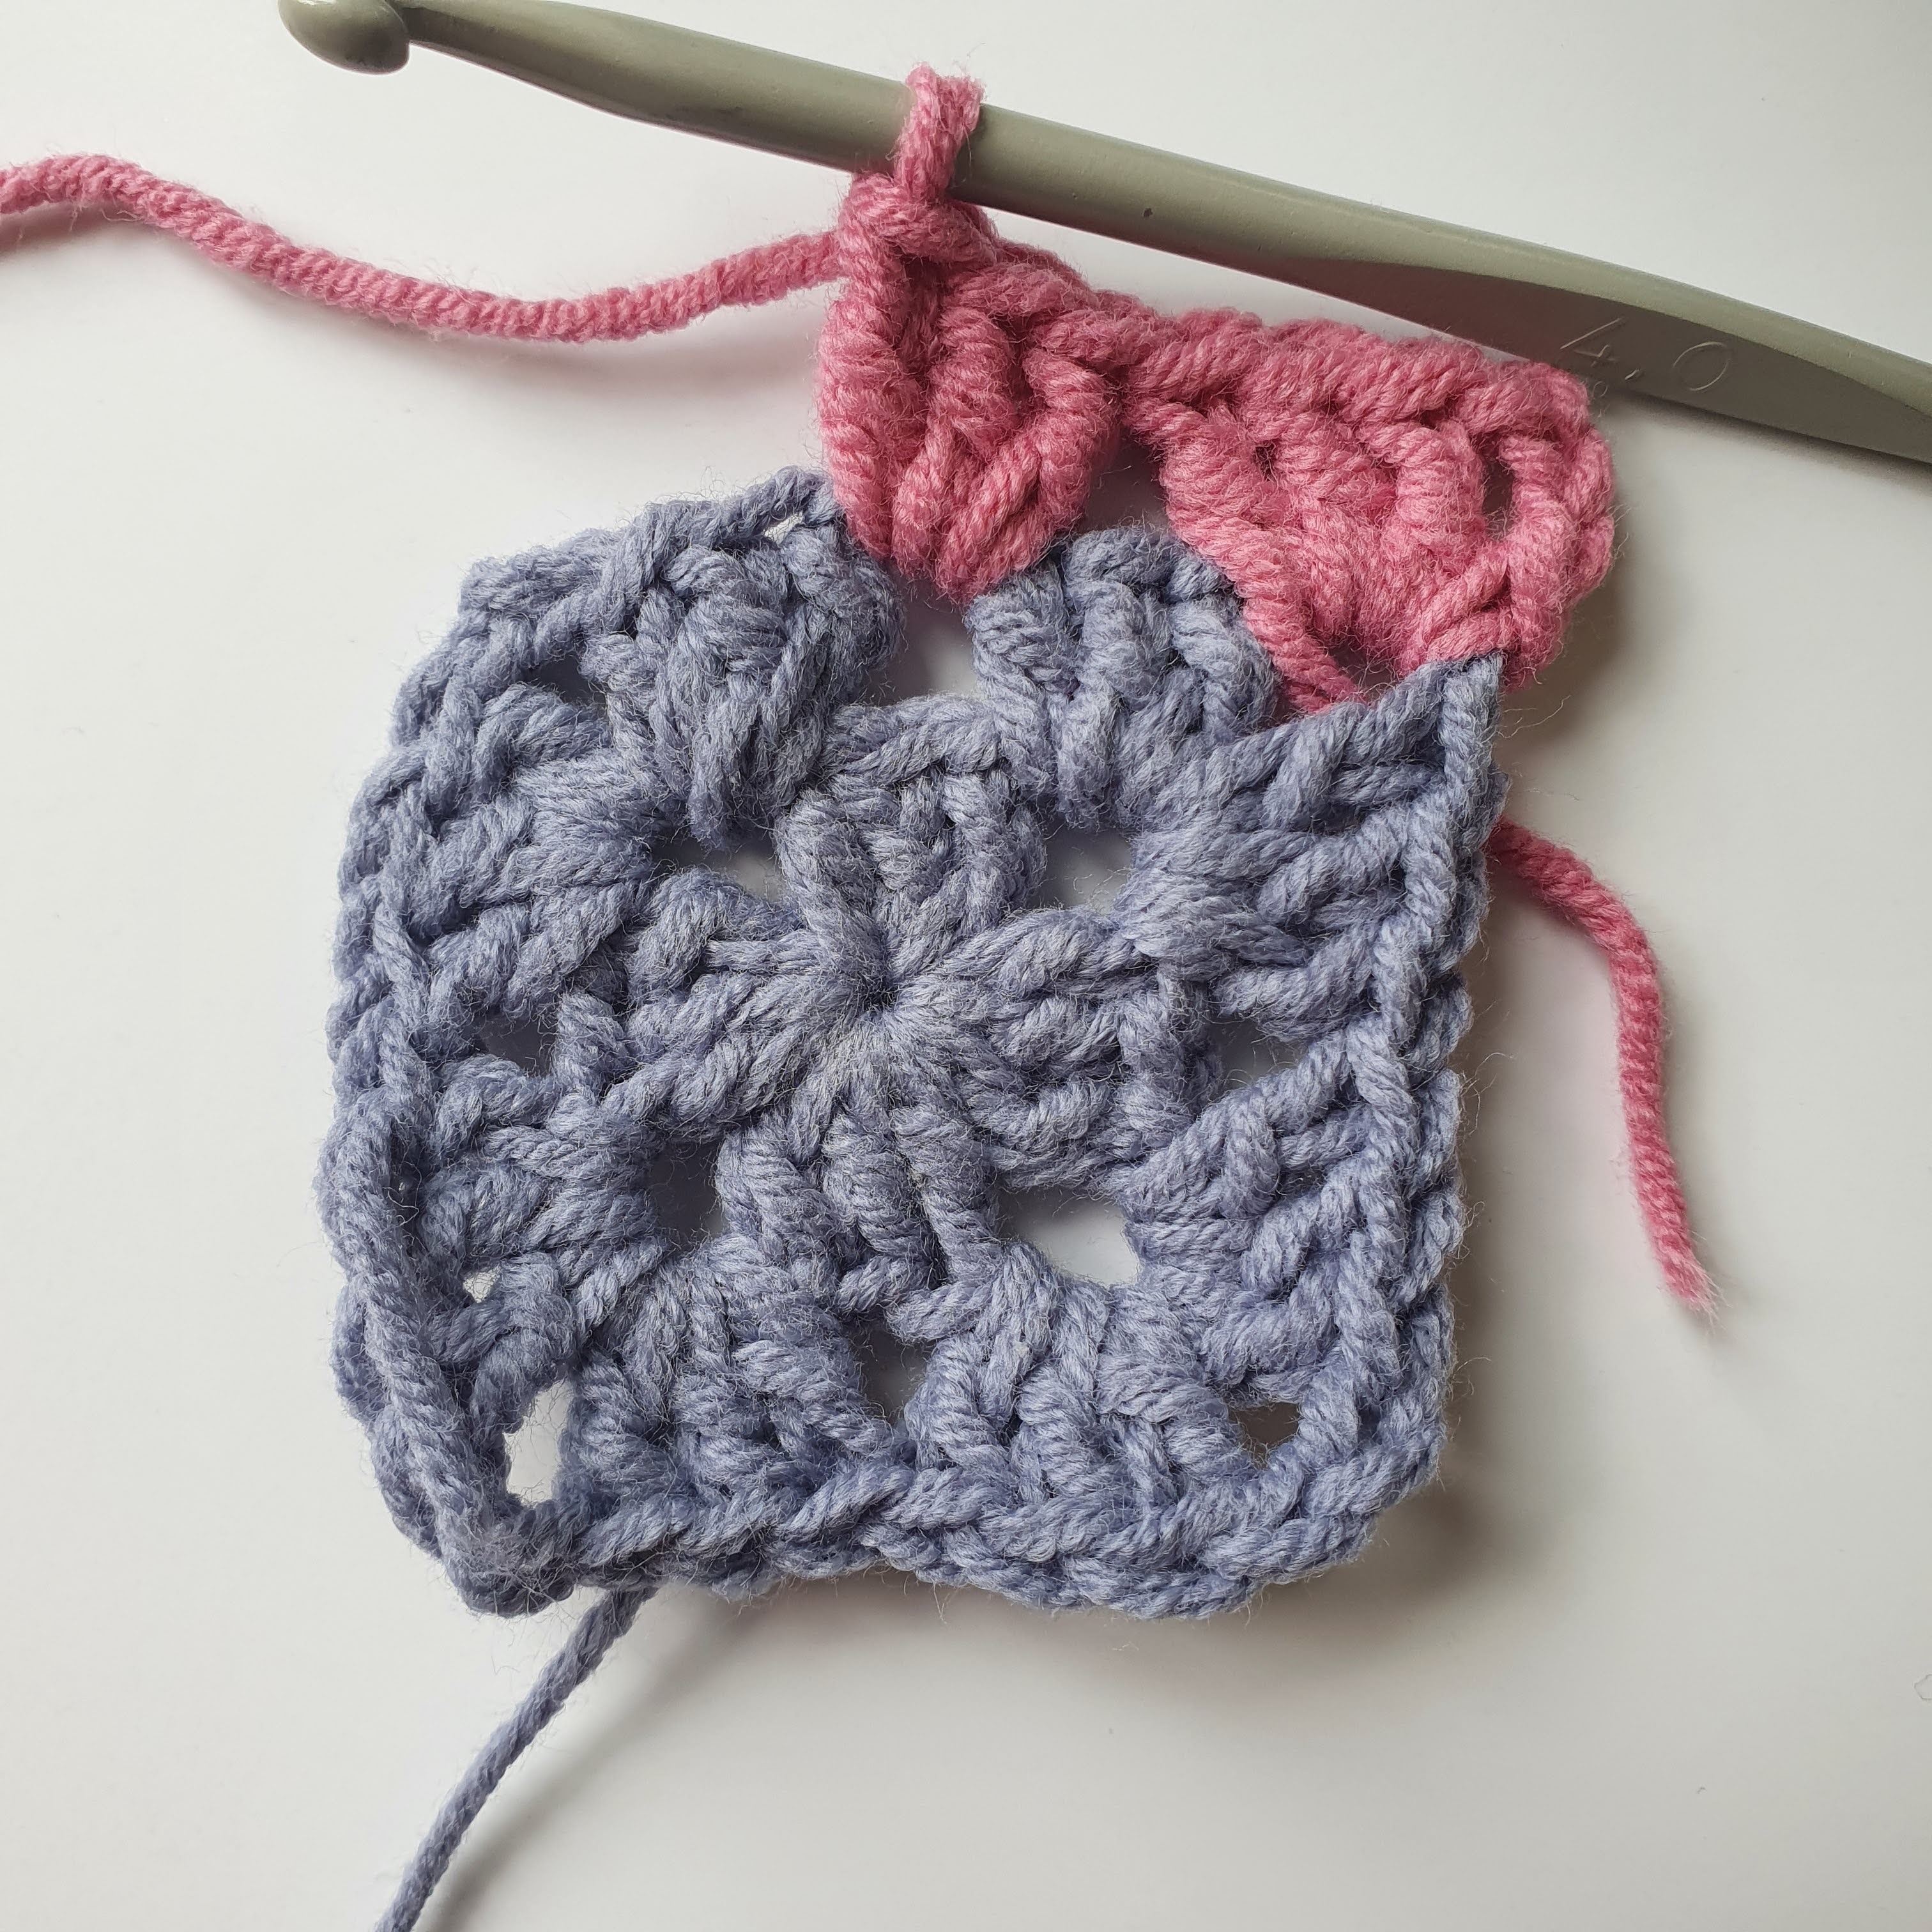
16. Chain 3 and make 3 dc in the same chainspace. After this, make 3 dc in every space between 2 groups of 3 dc and make 3 dc, 2 ch, 3 dc in the corner chainspaces.
16. Maak 3 lossen en 3 stokjes in dezelfde lossenruimte. Daarna maak je 3 stokjes in elke ruimte tussen 2 groepjes van 3 stokjes. In de lossenruimten in de hoeken haak je 3 stokjes, 2 lossen, 3 stokjes.
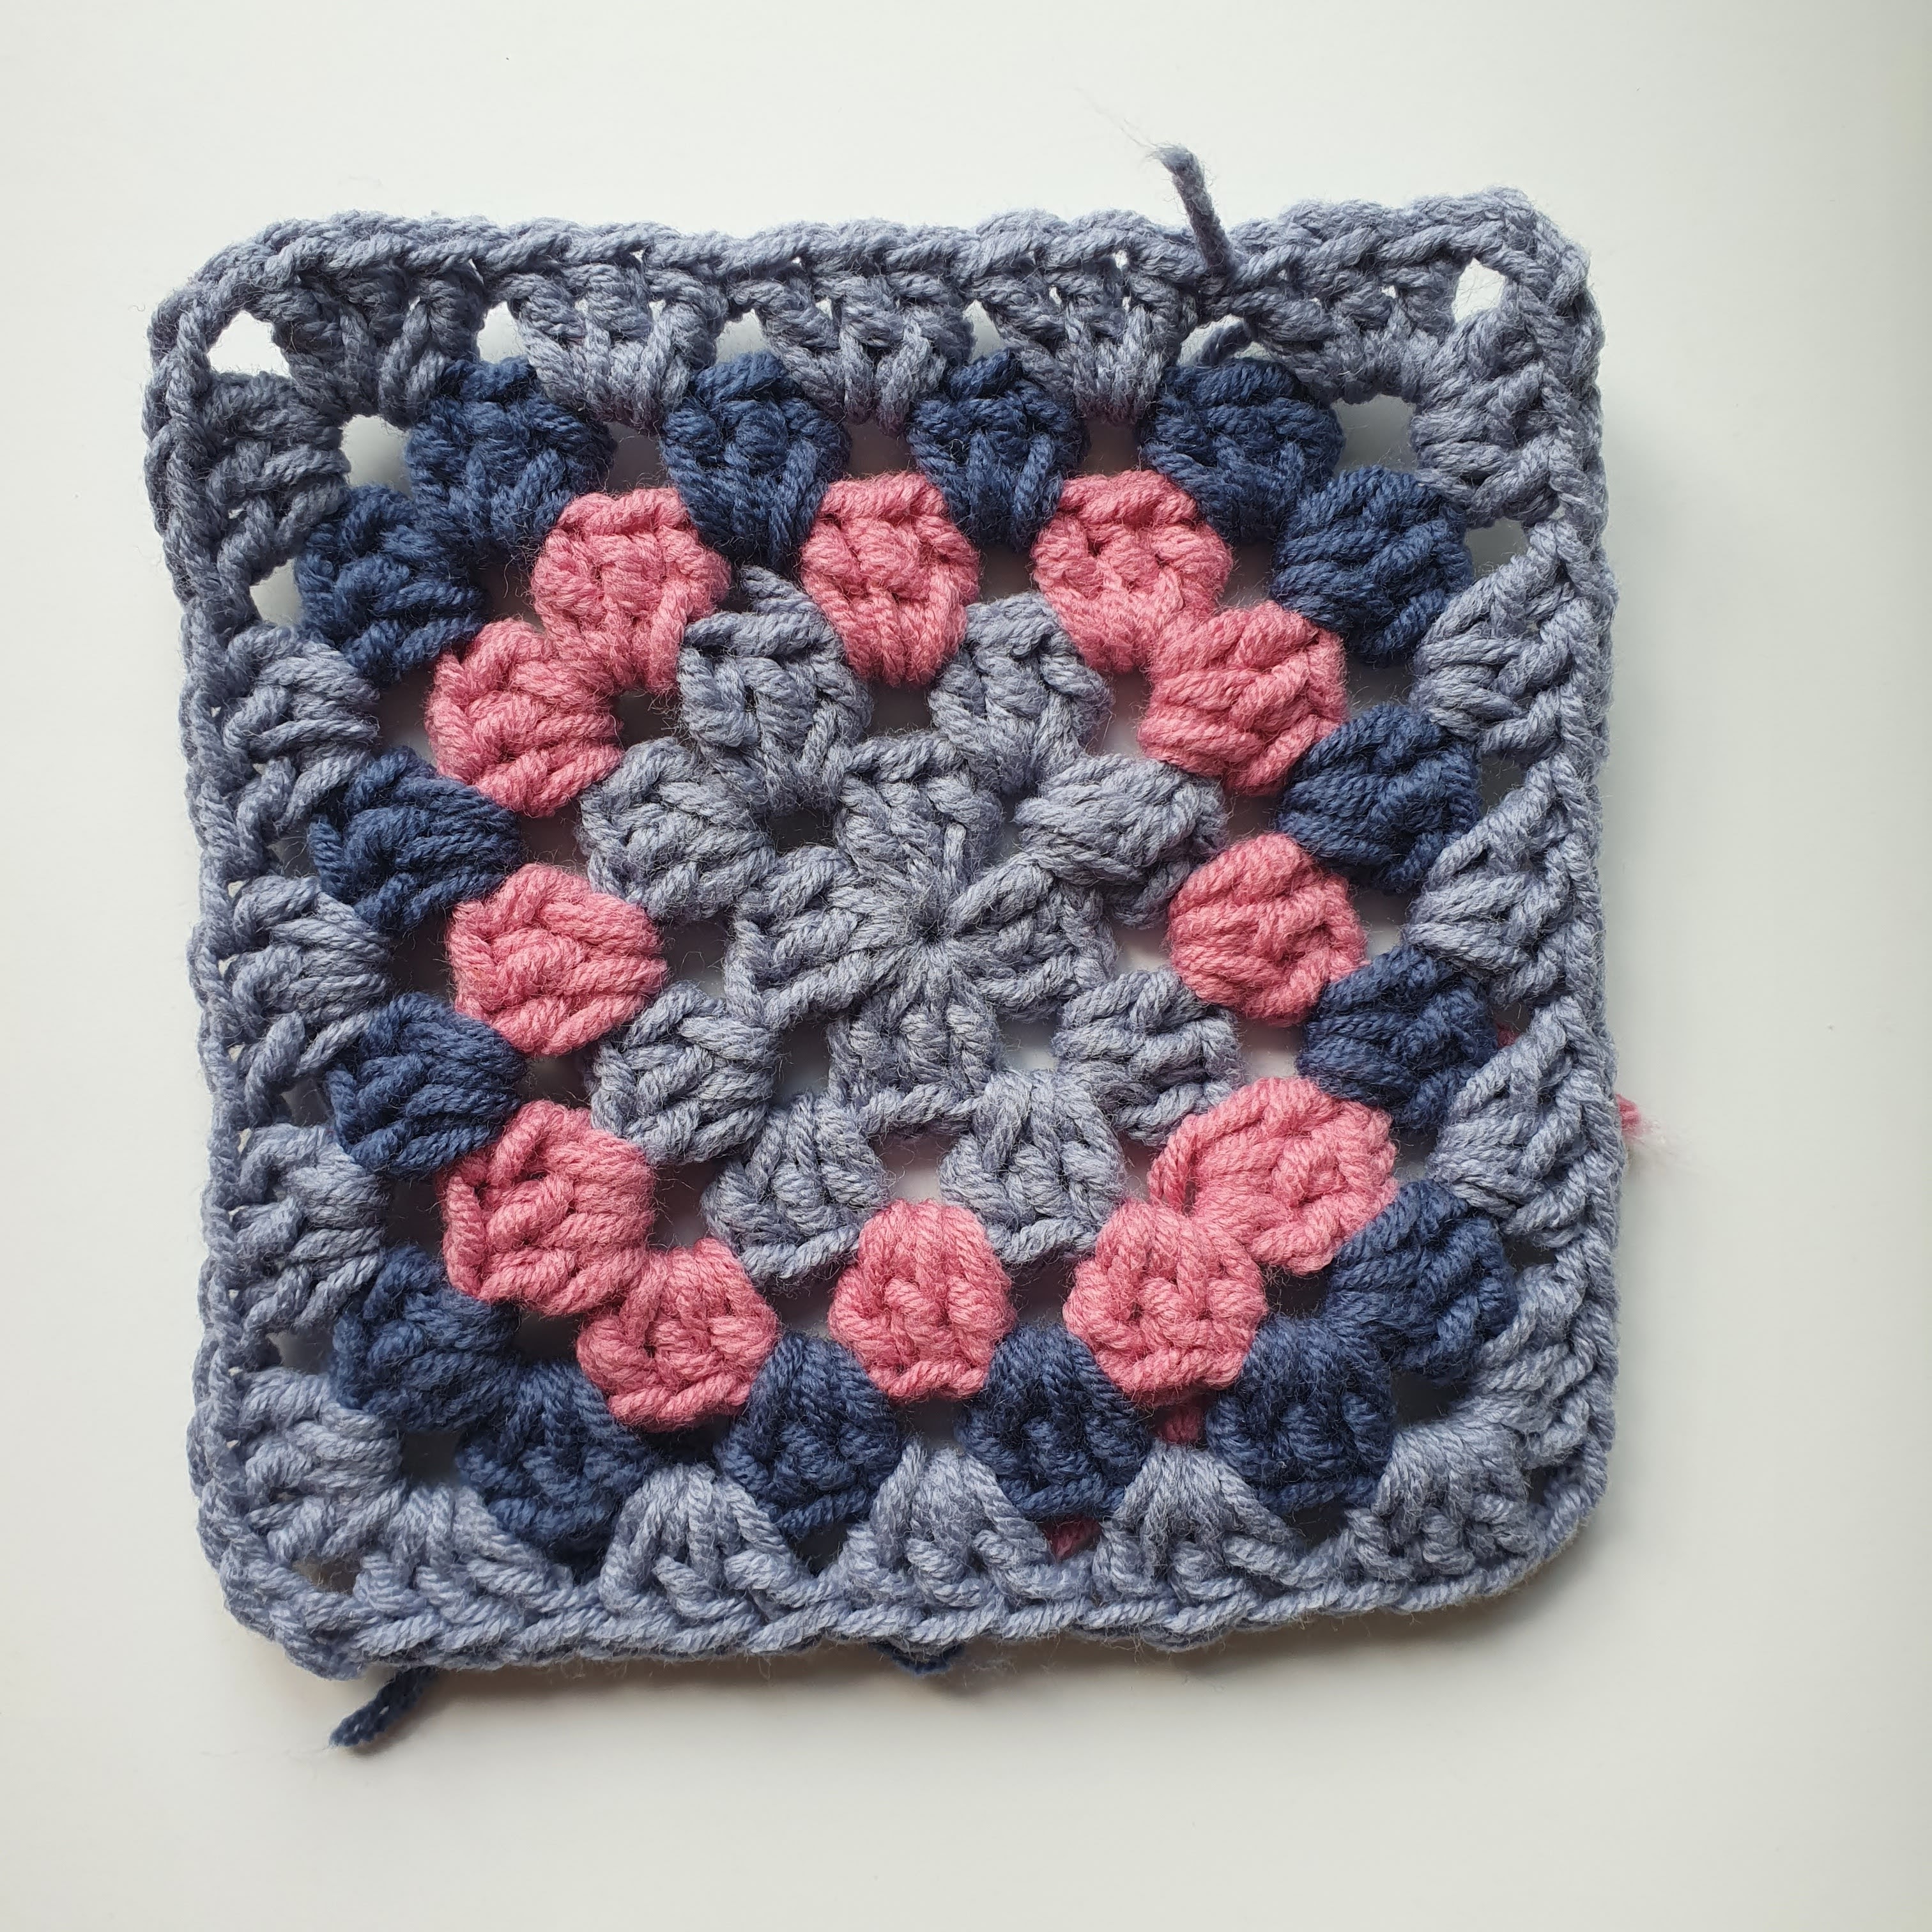
17. Continue with steps 6-9 (and 10-15 when changing colour) to make the square as big as you want.
17. Herhaal zo steeds de stappen 6-9 (en 10-15 als je van kleur wilt wisselen) om het vierkant zo groot te maken als je zelf wilt.